Let us start by explaining what NVIDIA drivers are. There is something called GPU which is wedged beside our CPU in our systems which is basically responsible for all the graphical and video representations in all our applications. NVIDIA drivers help the GPU to perform to its standards and optimize it for a new addition of games. While launching a new game, to avoid any sudden hanging of applications or disruptions of screen frames, NVIDIA drivers help in smoother installations or transitions without any major hiccups.
Sometimes in order to update a new version of the driver, it is necessary to uninstall the present driver before we upgrade the new version. The uninstallation is a tedious process as it involves purging a lot of supported components that might be in use in our running applications. Sometimes leaving residues of these uninstalled driver components will call for disruptions in the purging process rendering difficulties while installations of the new versions.
The probable components of these NVIDIA drivers are GeForce Experience, PhysX System Software, and Graphic drivers. These components boost the performance of the drivers for optimization, sharing communication, and other important functionalities. Hence, removing the driver calls for the removal of all these components as well. The uninstallations have to be done in safe mode and carefully.
Let us get into the steps that precede the uninstallation of the driver. First booting the system in safe mode has to be done prior to uninstallation.
Safe mode boot:
Below are the steps to be followed.
- Open the Run dialog box
- Type msconfig
- In the service window, navigate to the Boot tab
- Select the OS
- Enable the safe boot option
- Click the Restart button.
The system will restart, and after the system is booted, again navigate to the same msconfig page, disable the safe boot option, and navigate out of the window to do your uninstallations.
Uninstallation of the driver:
As we mentioned earlier, uninstallation could be a detailed process involving a lot of layers. Hence, there are two types of uninstallation methods that can be tried. If we want to purge only the drivers, the below method will do the necessary action. Let us quickly get into the details.
- Navigate to Device management page through Run window.
- Navigate to Display Adapters.
- Right-click on the NVIDIA Adapter and uninstall it.
“Delete the driver software for the device” option should be chosen for complete uninstallations. Check that radio button and proceed with the uninstallation. This method will purge the drivers completely while the software components will not be deleted. To have a complete deletion process, the below steps will have to be followed.
- Open Control Panel through the Start button.
- There is an option called “Uninstall a program” in the open window. Click on it.
- Find all the related components of NVIDIA drivers and uninstall it.
After this process, the restarting of the machine is needed to capture the changes.
Leveraging third-party tools:
Often uninstallations result in failures as the related components will be missed by the deletion process when done manually. Hence leveraging the use of third-party software to enable a clean purging of components will prove effective. Let us get into some of the powerful third-party tools that help for the uninstallation of drivers.
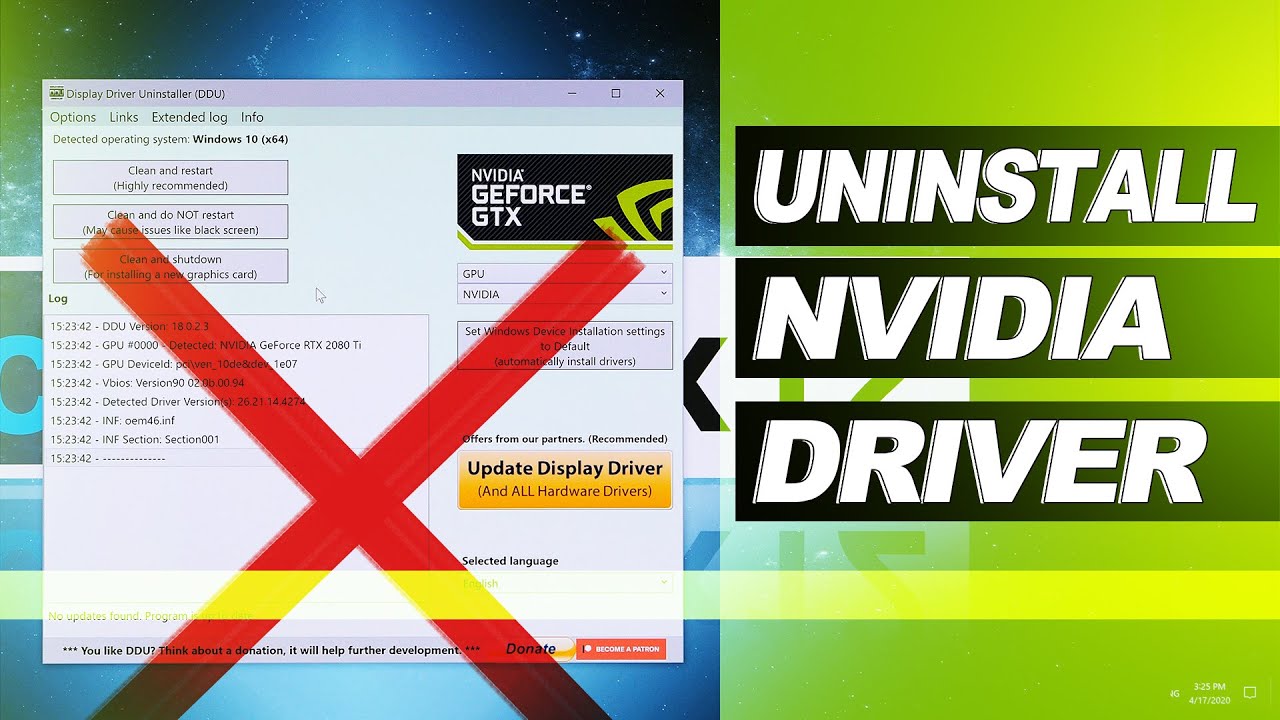
There is a special program called Display Driver Installer (DDU), which helps in uninstallations. This will purge all the related drivers and result in clean execution. However, this method also will help in purging away only the drivers, and the rest has to be identified and deleted.
To explain the working scenario of this tool, first, we launch DDU and it will itself pop us with options of what components to be removed. Click the clean button and restart the machine to revive its effect.
Another majorly used third party tool is Driver Easy. This will also list you with all the options of the related drivers to be purged. To do this,
- Install Driver Easy;
- Navigate to tools;
- Go to Driver Uninstall;
- Navigate to the Display adapters and NVIDIA;
- Click Uninstall to remove the driver.
Again after this purging process, do not forget to reboot the system to check on the completed uninstallation.
Conclusion:
After the uninstallation of the old driver, the new NVIDIA driver can be installed. There are third-party tools to identify the new versions and install them. Those tools can be leveraged. The aforementioned steps have proven to be effective in uninstalling the driver. Any other third party tool can also be leveraged for uninstallation as well.