If you are a regular iOS user, then you must be familiar with iTunes. While it is a freely available application developed by Apple, a lot of people find it hard to use it. For instance, if you wish to import photos from iPhone to computer, then iTunes can be a complicated solution. This is why a lot of users look for alternatives and a simpler solution. Don’t worry – we have got you covered. In this post, we will teach you how to import photos from iPhone to Windows or Mac in three easy ways, both with and without iTunes.
Method 1: dr.fone – Transfer (iOS) – The easiest solution to transfer iPhone data
For all those people who want a fast, reliable, and user-friendly way to transfer data between iPhone and computer, this would be a perfect solution. A part of the dr.fone toolkit, the Transfer (iOS) application can be used to move all kinds of data between different sources. You can transfer photos, videos, music, contacts, messages, etc. pretty easily. Move all data at once or simply perform a selective transfer.
With dr.fone – Transfer (iOS), you can import photos from iPhone to computer and vice-versa. You can also transfer data between iPhone and iTunes (without using iTunes) or between different devices as well. The application is available for both Windows and Mac and offers a free trial version.
- To start with, install and launch dr.fone toolkit on your computer and visit the “Transfer” section from its home.
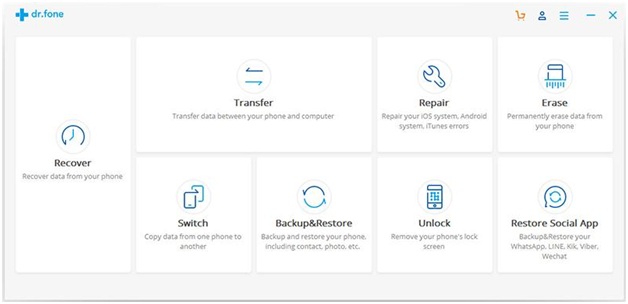
- Connect your iPhone to the system using an authentic cable. Once it gets detected, you will get its snapshot with several other options.
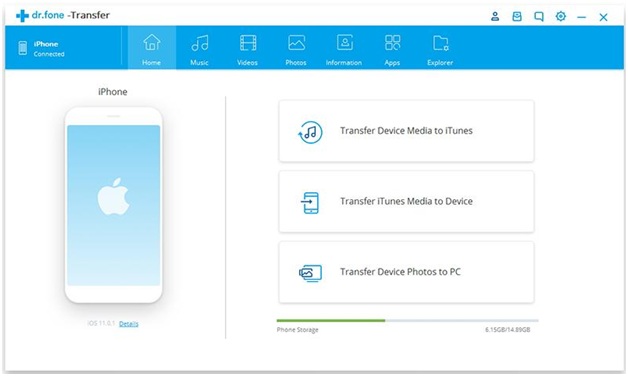
- From the provided shortcuts, click on the “Transfer Device Photos to PC” option. This will transfer all photos from iPhone to computer.
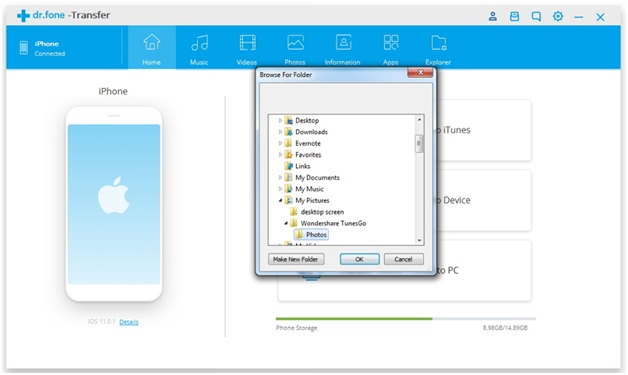
- As a browser window will open, go to the location where you wish to save the photos and start the transfer process.
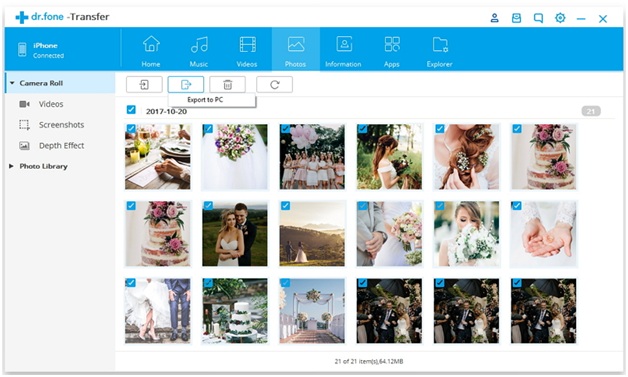
- To perform a selective transfer, click on the “Photos” tab. Here, you can have a preview of all the saved photos in different categories.
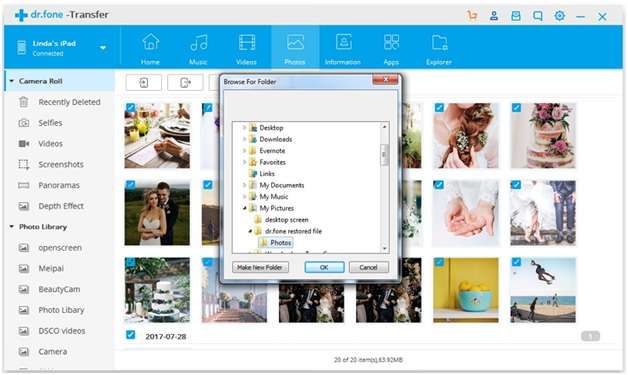
- Just select the photos (or albums) that you wish to transfer and click on the export icon. Subsequently, you can choose to export the selected photos to your computer.
- A pop-up window will open so that you can select the location where you wish to save the photos.
By following these basic steps, you can easily import photos from iPhone to Windows or Mac. You can also export photos to your iPhone and manage other types of content as well in a similar way. As you can see, you can easily manage your iPhone like a pro without any prior technical experience using dr.fone – Transfer (iOS).
Method 2: Use Windows AutoPlay to Import Photos from iPhone
With the holiday season approaching, people look for ways to transfer funny family Christmas pictures as well. After all, nobody wants to lose these precious memories. If you have a Windows computer, then you can easily transfer your pictures through its AutoPlay feature. Here’s how it works.
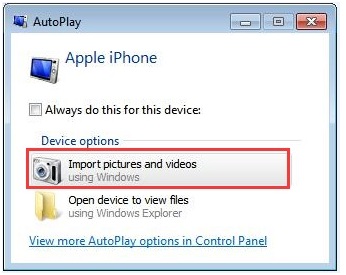
- Connect your iPhone to a trusted Windows computer. If you are connecting it for the first time, then you need to trust it first.
- Windows will automatically detect your phone and display the AutoPlay pop-up. Click on the “Import Pictures and Videos” button to continue.
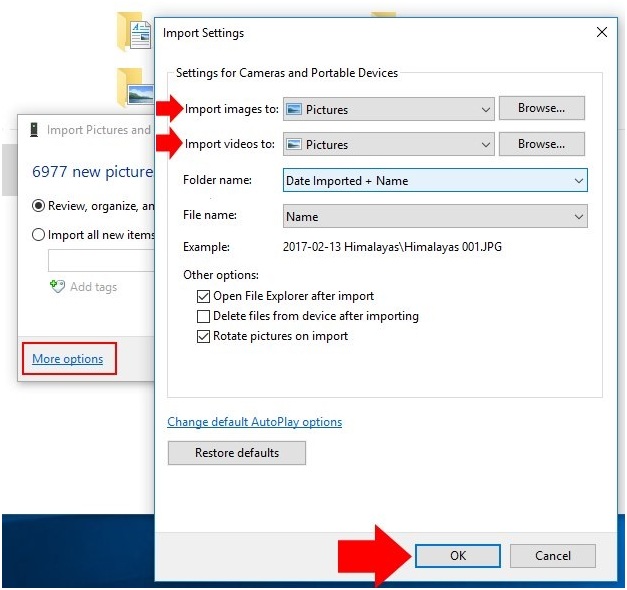
- The stored photos on your iPhone will start transferring to the default location on your system. To alter these features, click on the “Import Settings” button.
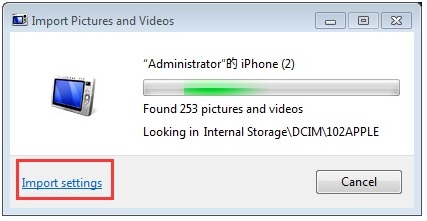
- Here, you can choose a location to save the imported photos on your Windows system.
While the solution might seem simple, sometimes Windows don’t detect the connected iOS device. Also, you can’t selectively transfer photos like dr.fone toolkit with this technique.
Method 3: Transfer photos from iPhone to Windows/Mac with iTunes
If nothing else seems to work then you can also import photos from iPhone to Windows or Mac using iTunes. Although it is a more complicated solution and won’t let you preview your photos like dr.fone – Transfer (iOS). Also, this would sync your photos between different sources rather than doing a one-way transfer. In addition to that, we recommend updating your iTunes so that it would be compatible with the connected iPhone.
- Using an authentic lightning cable, connect your iPhone to your computer and launch an updated version of iTunes on it.
- Once your phone gets detected by the system, go to the device icon on iTunes and select the connected iPhone.
![]()
- This will display various options related to your connected iPhone. Go to the “Photos” tab on the left.
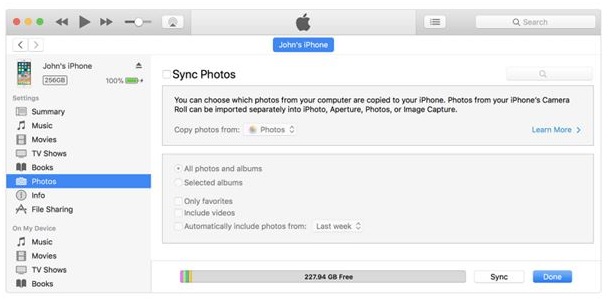
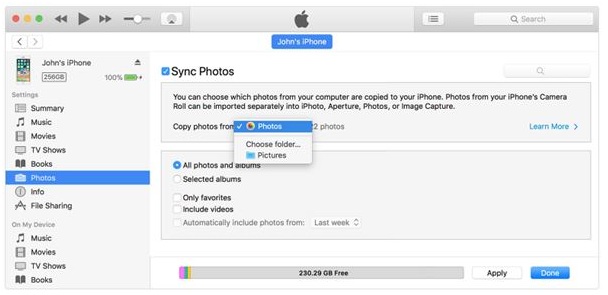
- From here, you need to turn on the option for “Sync Photos”. In addition to that, you can also choose if you wish to sync all photos or selected albums.
- After making appropriate selections, click on the “Apply” button and wait for a while as your phone would sync photos with iTunes.
Which option should I choose?
As you can see, iTunes is a complicated solution and won’t let you preview your photos beforehand. Also, it would only sync your photos which might not meet your requirements. Similarly, the AutoPlay feature doesn’t always work on Windows and can’t be followed in Mac. Therefore, if you want to have a hassle-free experience and make the most of your device, then try dr.fone – Transfer (iOS). It will let you transfer data between iPhone and computer (Windows/Mac) in seconds and that too in a 100% secure way.
So what are you waiting for? If you wish to save your family Christmas photos, then download dr.fone – Transfer (iOS) on your Windows or Mac right away. It will let you import photos from iPhone to computer (and vice-versa) without any trouble. Not just that, you can also use it to transfer your videos, music, contacts, and other types of content as well.