Most of you must be already familiar with Apple’s digital audio workstation GarageBand. For those who don’t know about GarageBand, it is basically a software that comes free with Apple’s devices like Mac, iPad, and iPhone. What does this software do? It is a powerful audio recording software through which you can record multiple tracks, edit them, add effects, and mix them with ease.
If GarageBand isn’t already installed on your iPad, you can fire up the App Store and can search for the application. It is free to download on Apple devices and will take a few minutes to install. Now, if you are looking to record your guitar in GarageBand, it is easier than ever to get the job done. Let’s get down to check out how to do that and what all things you will be requiring?
Equipment Needed
Before getting into the details of the software, let’s first talk about what external/physical equipment you will need to record your guitar. You need a device that will serve as a medium between your iPad and your Guitar. You can purchase iRig or iRig Pro for an electric guitar. What this device will do is basically let you connect your guitar to this audio interface and from the other end, you can connect the cable to your iPad. The guitar signal will be easily transferred to the GarageBand application for recording with the help of this device. There is also a slot to connect your headphones cable to this device so that you can easily listen to what you are playing/recording. For the external audio interface, you can order one online or can get one easily from your local music shop. There are many big expensive ones also available with multiple features and input slots. The basic one will work fine but you can use any.
Now, if you are using an acoustic guitar, you will have to get a mic to connect that to your audio interface. There are multiple spots on your guitar where you can clip the mic. If your acoustic guitar has an onboard preamp, you can use that to connect just like we did with an electric guitar. You can also buy external preamps like iRig acoustic mic.
Setup and Recording
- Launch GarageBand from the Applications tab in your iPad. Make sure that you have connected your guitar to the external audio interface and the other cable is connected to your iPad.
- On the top left side of the screen, you will see a quarter cable icon. Click on it to open Input settings.
- In the input settings, turn on the Monitor option and select the input channel depending on which input you have connected your guitar to. Now, you will be able to hear the guitar playing through the amp model.
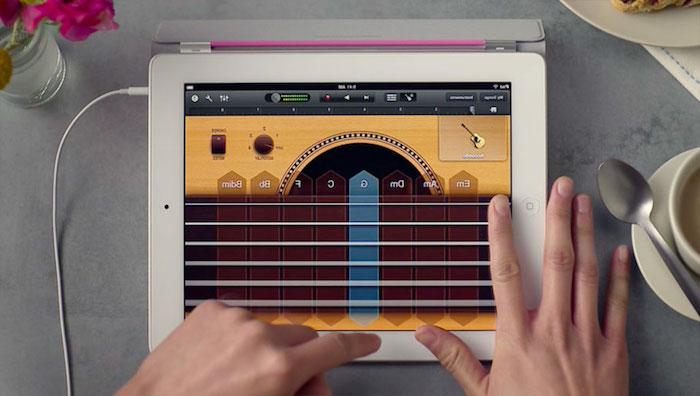
- As everything is connected and configured, let’s have a look at the main interface of the Garageband application.
- You will see Amp/Mixer toggle, controls (recording and playback buttons), toggle metronome, and recorded input.
- GarageBand is now basically working as a digital preamp with the help of which you can manipulate the signal just like you did with any amplifier. By default, there are multiple amp models/combinations loaded in the application and you can design your own as well. There are not many options available in the iPad version but with the ones available, you can really record an amazing track.
- To check out the various features, you can click on the question mark icon on the top right corner. It will display the functionality of each icon. You can change amp models, tune your guitar, toggle stompboxes, change the length of the recording, switch between guitar and bass amps, and so on.
- Just as with the physical amplifier, you can adjust various controls such as Gain, EQ, Reverb, Depth, Speed, Presence, Master, etc. in the GarageBand amp.
- Next comes the pedals. Similar to the physical pedals, you can use the digital effects pedals in GarageBand. Just like the wide collection of sample amps, there are many different digital effects pedals as well.
- If you are familiar with the physical pedals, then these stompboxes work exactly like them. You can pair them up, adjust the knobs, and engage the pedals with a bypass switch, the result will be the same.
- To activate the pedalboard in GarageBand, click on the little guitar pedal icon on the top right in the amp model screen. This will take you to the pedalboard screen. According to the amp model you are using, you will see two or three pedals already activated.
- To add a new stompbox, simply click on the empty pedal and you will see around 10 stompboxes. Once you have loaded your preferred stompboxes, you can click on the button on them to turn them on. Now drag the knobs to adjust the pedal’s EQ settings and tone. You can change the volume, add distortion and do a lot more with the stompbox that you choose.
- Now that everything is completely configured and the setup is finished, you can go ahead and click on the Record button. Play your guitar and record it. You can listen to the recording live by plugging in your headphones to the audio interface.
- For an acoustic guitar, as mentioned earlier, you can use an onboard or external preamp. For this, you can follow the same steps as above. If you go with a microphone to record, then open the Audio recorder in GarageBand. You can adjust the input levels on the left side of the screen.
- Click on the Record button to start recording your acoustic guitar. Once the recording is done, you can then edit the soundtrack from the preloaded effects and presets available. You can also adjust compression, chorus, reverb, etc. according to the effect you choose. Edit and listen to the track, make adjustments and save the track.
You don’t have many editing options available on the iOS version of GarageBand. While recording and editing on your Mac, you can do significant changes to the track. But that’s not the case on your iPad. So, practising a lot with your guitar to record is the key for perfection. So, if you are using an electric guitar or an acoustic guitar, follow the steps mentioned above to set up your device. Experiment with different amps and pedals and you will get the desired results.
Hope you liked the easy tutorial to record your guitar in GarageBand for iPad. Play some great tracks and record fantastic music. Have a melodious day!