The built-in Snipping Tool in Windows has been updated and comes with a new screen recording feature. With the Snipping Tool on Windows 11, you will be able to record the screen without restrictions imposed by the Xbox Game Bar. In this article, therefore, we will explain how to use this new feature for screen recording on Windows 11.
For a backup, a professional Snipping Tool alternative will be provided to help you screen record anything on Windows 11. Without further ado, let’s get started.
Part 1. Check Your Windows OS Version
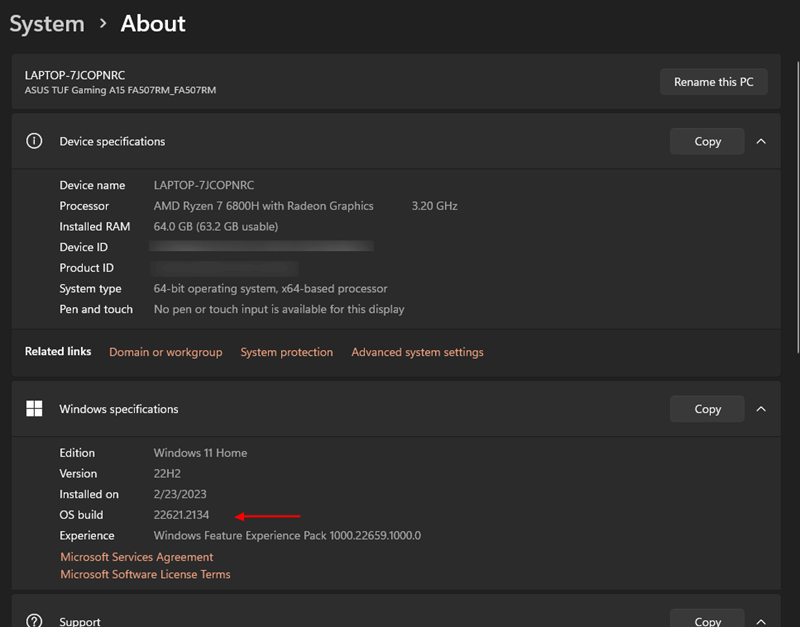
There is a system requirement for using the Snipping Tool on your computer. So just ensure whether your Windows 11 OS version is 22000.0 or higher before using it. If you are not sure about your version, just follow the steps below.
- Open the Settings by pressing Windows logo key+I on your keyboard.
- In the Setting window, click on the System.
- Scroll down in the left sidebar and click on About.
- Find the Windows version information under the Windows specifications section.
Part 2. Prepare and Start Recording on Windows 11
If your Windows version reaches the requirement, you can now activate the Snipping Tool to record the screen on your PC by following the step-by-step guide.
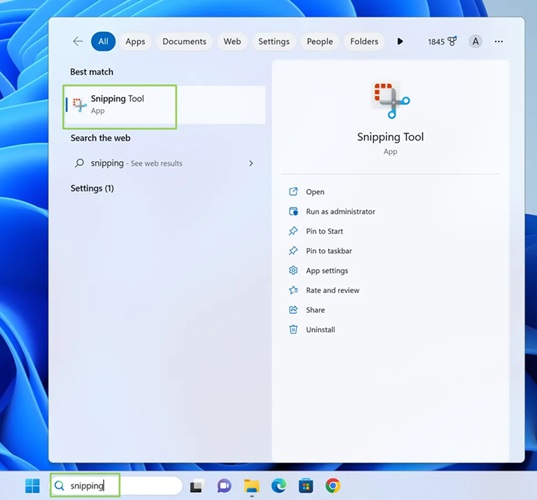
Step 1. Click on the Start Menu, then find and click on Snipping Tool in the list of applications. Alternatively, you can also use Shift + Windows Key + S shortcut to launch the Snipping Tool directly.
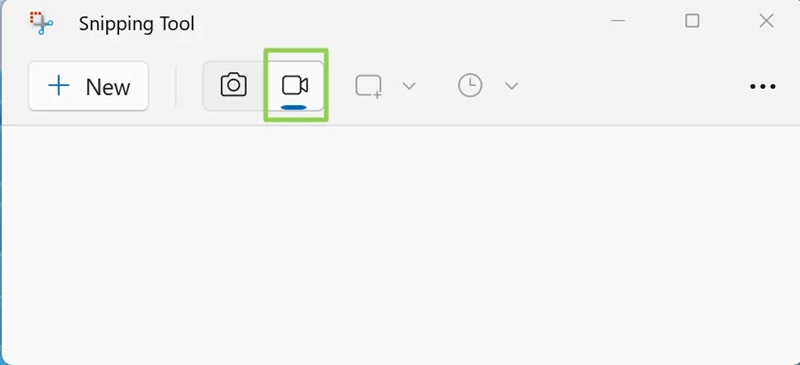
Step 2. In the Snipping Tool interface, hit the Camera icon on the toolbar to enable recording mode and then click the New button.
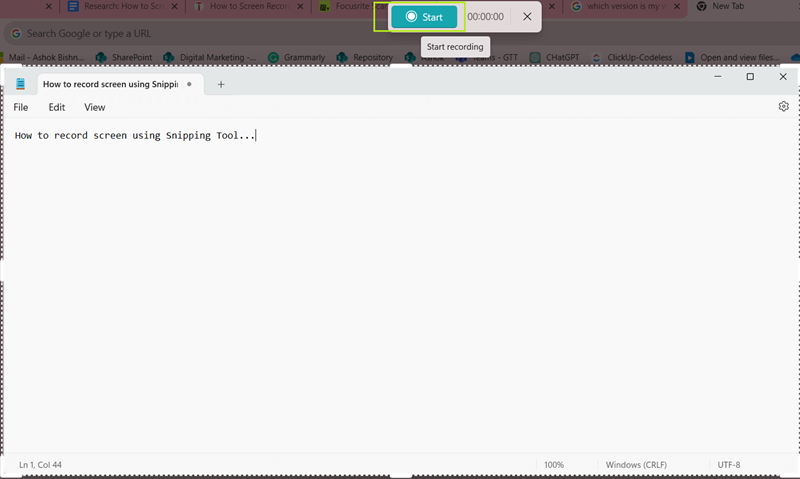
Step 3. Crop the specific area of the screen you want to record by dragging the white dotted line.
Step 4. Select the Start button located in the small toolbar that appears at the top of your screen to start the process.
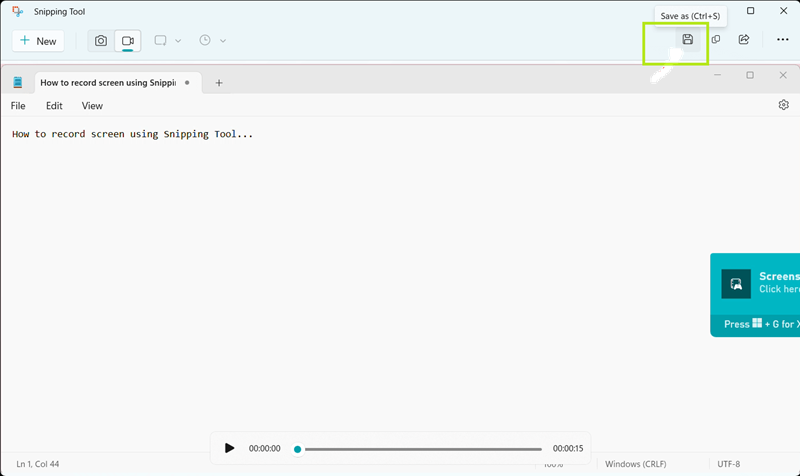
Step 5. Click the Stop button to stop the recording process. Then you can hit the Save icon or press Ctrl+S to save the recorded videos as an MP4 file (the only format) on your computer.
Tip: Best Tool to Screen Record on Windows 11
Although it is easy to record on Windows 11 by using its built-in Snipping Tool, this tool also comes with several limitations. You can’t set a time before the recording for convenience. In addition, it only supports MP4 output format. And the records grabbed by this tool are of low quality.
To avoid these limitations, you are recommended to use the reliable FonePaw Screen Recorder. It is the best screen recorder on Windows 11, recording your screen, microphone, and webcam simultaneously in high quality.
Delve into FonePaw’s sparkling features as follows:
- FHD Video Recording in Various Output Formats. FonePaw allows you to record screen video at up to 1080p and 60fps quality without adding any watermark. It offers several popular output formats such as MP4, MOV, AVI, F4V, etc., meeting all your playback needs.
- Simultaneous recording of system sound and microphone. Unlike Snipping Tool, which is limited to basic screen recording with system sound only, FonePaw supports simultaneous recording of your computer’s system sound and microphone, making it ideal for recording tutorials or presentations.
- Adjustable recording schedule. You can set a task schedule with start time, repetition, recording length, etc. to let the software record videos automatically for you.
- Customizable recording area and live annotation. You are free to customize the recording area and add live annotations and mouse effects during the recording process, which is especially useful for creating instructive or explanatory video content.
If you are interested in this all-in-one tool, just start your recording and access its more advanced features by following the step-by-step guide.
Step 1. Download and install the FonePaw Screen Recorder from the official website on your Windows 11 computer.
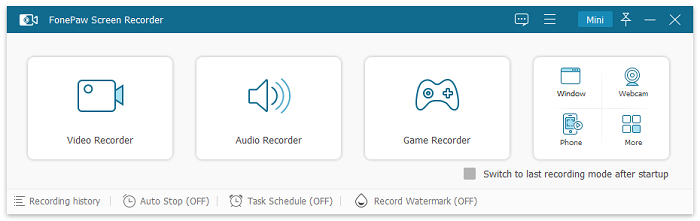
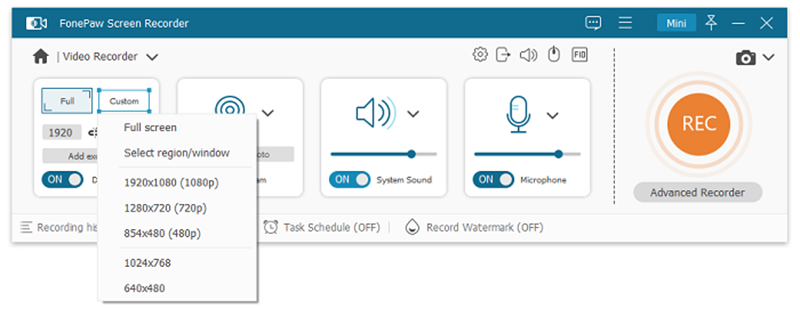
Step 2. Click Video Recorder and then select the recording area by clicking on the Full button. After that, you can turn on the webcam, system sound, and microphone if necessary.
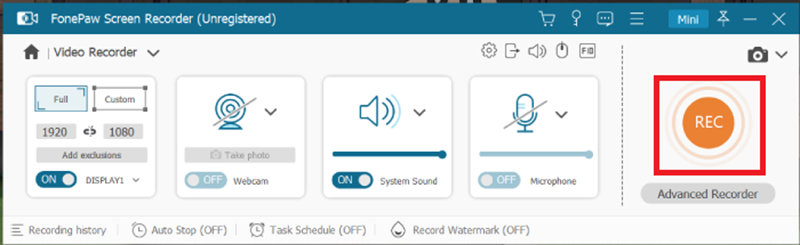
Step 3. Hit the REC button to start recording. During this process, capturing snapshots, adding real-time annotations and other features are available. Then press the Stop button on the control panel and save the records.
Conclusion
The built-in Snipping Tool on Windows 11 makes it easy to record screen whether you’re creating a presentation, devising a how-to video, or cooking up something for YouTube. However, more improvements should be made to remove the recent limitations. At this moment, if you crave more advanced features to meet your different needs, third-party professional recording tools like FonePaw Screen Recorder are a good option to enhance recording efficiency and quality.