Destiny 2 is an online multiplayer shooter game from Bungie which has been trending in recent times due to the notoriety of the game. Gamers have been crazy about this high-powered game which has currently been played by more than 6 million players worldwide. In the recent wake of demand for this game, there has been an upsurge of error that crops up while connecting to the game. It is called the error code bee which prevents the connection to the game from the user’s console. This has sparked some resentment among the Destiny gamers who have lamented about this sudden emergence of error.

As we probed the cause of the error, it has been believed to be arising from a faltered network connection. Apparently, there are error codes like BEE, LION, and FLY indicating the disconnections between your network and the destination servers of the game. Generally, if there is any slight disruption or congestion in the signals between your system and the Bungie server, the error codes pop up indicating some poor network connections.
There are multiple ways to mitigate the issue. However, knowing the exact problem and trying to resolve that will alleviate the error precisely.
Alter the internet connection:A wireless connection could most probably bring about this kind of connection errors. If you are using a wireless connection, try shifting it to a LAN cable connection for a proper and smooth connection. However, the error might pop out irrespective of what kind of connection you are in. The error code can appear even if there is a slight glitch in your modem or router. Basically, any kind of alterations in connection could do the magic. Validating your modem or router for any issues could also alleviate the issue considerably. Sometimes changing your old defective router or modem also can prove effective. Restart and unplug the console:This is the cursory solution that has been very effective in most of the Bee error code cases. This could work for any console. Before trying out this option, you have to secure all the game files as a backup in some other location. Since you have to unplug your console and reconfigure it, there needs to be a careful execution of the steps according to the console you use.
For XBOX console:
2. Detach the power brick. 3. Attach the power brick again until the light shows up. 4. Switch on the power. There is an alternative for the above steps which might come in handy as well:
2. Clear all the Mac addresses from the MAC address tab. 3. While the process unfolds, your system will go through a reboot automatically flushing off all the cache memories that have been causing disturbances. 4. After the reboot, open the game and try your luck. For PS4:
2. Unplug the cable. 3. Leave it for few minutes. 4. Plug it back and try the game. Port forwarding or alterations:High-end games like Destiny would use complicated router ports. Some normal routers may not allow these ports to be connected. Hence, doing a port forwarding could essentially fix the issue. First, we need to get the MAC/IP address of your console before proceeding to forward your ports. Doing this could involve some complications as it needs careful execution of a step-by-step process. It also varies from console to console. We will see the below steps for different consoles. Finding the PS4 and XBOX one IP address:
2. Go to the Network. 3. Go to the View Connection Status. 4. Find the IP address and MAC address and note it somewhere. For XBOX one, there is an additional need to save your 12 bit MAC address. After the above steps are executed according to the consoles, then we go to the part we forward the ports.
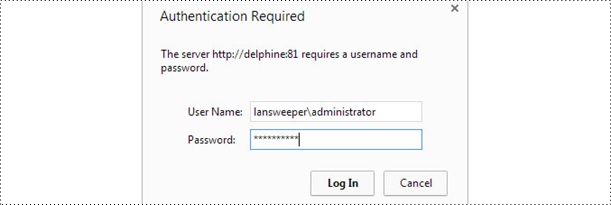
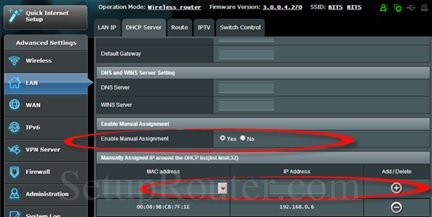
2. It will ask for authentication, the credentials will be available in the router’s catalog or port forward website.
3. The screen where you are supposed to fill the details of your new porter will pop up. 4. The screen will have an option for manual assignment of ports, identify that. It will be either a toggle button or a radio button. Activate it accordingly. 5. Below the option, there will be tabs for entering your new MAC address and IP address.
6. Click the ADD button. 7. From there, navigate to the Port forwarding window, it could be positioned according to the console you use. 8. Open the window, and enter all the TCP & UCP values along with the addresses you noted down initially. 9. Finally click the enable option depending on your console. 10. Restart your console finally after you have applied the changes. This might put a permanent full stop to this problem depending on the complexity of the issue. Final word:The above mitigations are generally considered to be effective. If they fail to fructify, there is always an option to consult a local internet provider or a system administrator to resolve the issue.
|
