In today’s interconnected world, a reliable WiFi connection is essential for staying connected with friends, family, and work. Setting up a wireless router can seem daunting, but with a bit of guidance, anyone can create a stable and secure home network.
This article will provide straightforward instructions on how to use a router for WiFi, ensuring an optimal and user-friendly experience.
Before diving into the setup process, it is vital to understand the role of a wireless router. Routers serve as the central hub of a home network, facilitating communication between various devices and the internet.
They are responsible for creating a WiFi network that devices can connect to, as well as handling both wired and wireless connections. By following the steps explored in this article, users will be able to establish a secure and efficient home network to enjoy seamless internet access.
With a focus on simplicity and clarity, this article will guide users through the essentials of router setup and configuration.
From connecting the router to the modem to securing the network with encryption, each step will be explained in detail, allowing even the least tech-savvy users to achieve a stable and secure WiFi environment.
By the end of this guide, readers will have gained the confidence and knowledge necessary to create a reliable WiFi network in their own homes. You will also be able to use a router for openwrt with ease.
Setting Up the Router for Internet Access
To set up a router for internet access, follow the steps mentioned below. These steps will assist users in establishing a connection between the router, modem, and the internet.
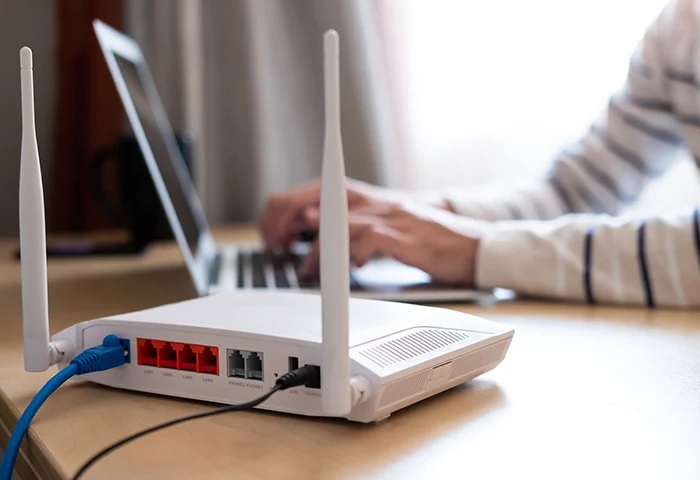
First, connect the router to the modem and the computer. Use an Ethernet cable to connect the modem to the WAN/WLAN/Internet port on the router.
Connect your computer to one of the numbered ports (1, 2, 3, or 4) on the router. The router and modem should be placed near each other for optimal results.
Once the router and modem are connected, it’s time to access the router’s settings. In order to do this, users need to identify the router’s IP address. The default IP address for many routers is 192.168.1.1, however, this may vary for specific models.
To find the correct IP address, open a command prompt on the computer and type ipconfig, then run the command. Look for the Default Gateway under the Ethernet or Wireless LAN adapter settings, and note the IP address.
With the correct IP address, open a web browser and type the router’s IP address in the address bar. Press enter to access the router’s settings page. A login screen should appear, asking for a username and password.
These credentials can be found in the router’s manual or on a label attached to the router. If the login details have never been changed, the default username and password should work.
Once logged in, navigate to the internet or WAN settings. Input the required information provided by your internet service provider. This may include a username, password, or specific connection settings. Save the changes, and the router should now be connected to the internet.
Configure the WiFi settings of the router. Set a network name (SSID) and secure it with a password (WPA2 is recommended for security).
Save the changes and look for the newly created WiFi network on your devices. Connect to the wireless network using the set password to enjoy internet access through the router.
Configuring Router Settings
Configuring a router’s settings is important to ensure a secure and reliable WiFi connection. To begin, connect a computer to the router using an Ethernet cable or establish a WiFi connection.
The router’s IP address is required for accessing its settings. Common IP addresses include 192.168.1.1 and 192.168.0.1. To find the specific IP address, type ipconfig in the command prompt and look for the Default Gateway value.
Once the router’s IP address is known, open a web browser and enter the IP address in the address bar.
This redirects to the router’s login page where the default username and password are needed. These login credentials are often found on a sticker located on the router or in the router’s documentation. Typical default usernames and passwords include “admin” or “password.”
After logging in, access the wireless settings to configure the network name (also known as SSID) and password.
It’s essential to set a unique SSID and a strong password to deter unauthorized access.
The password should be a combination of letters, numbers, and special characters for enhanced security.
In addition, navigate to the security settings to enable encryption methods such as WPA2 or WPA3, which provide a higher level of protection. Disable the outdated WEP method, as it is easily broken.
When configuring DHCP settings, ensure that the router assigns IP addresses to devices within a specified range.
For example, if the router’s IP is 192.168.1.1, the range could be 192.168.1.100 to 192.168.1.200. This range helps prevent IP address conflicts among connected devices.
Consider setting up a guest network with a separate SSID and password for visitors. The guest network allows internet access, but segregates it from the main network, providing security for personal data and devices.
Remember to save changes before exiting the router’s settings page. By following these steps, the router will be configured for optimal performance and security.
Connecting Devices to WiFi
A crucial aspect of setting up a WiFi network is connecting various devices to it. These devices can include computers, laptops, mobile devices, and printers. This guide will help you connect devices to your WiFi network with confidence and ease.
Firstly, locate your WiFi router’s login information, which typically consists of the username and password. You will need this information to access your router’s settings. If you’re unsure where to find this, consult your router’s manual or look for it on the router itself.
Once you have your router’s login information, you’ll need to find the WiFi network name (SSID) and the network key (also called WiFi password or WiFi network key).
This can usually be found in the router manual or on the router itself. If you cannot locate it, you might need to log into your router’s settings using the given username and password.
To connect a device, such as a computer or laptop, locate its wireless settings menu and enable WiFi. You should see a list of available WiFi networks. Select your network (SSID) and enter the network key when prompted. The device should connect automatically.
For mobile devices, like smartphones and tablets, open the settings app and tap on WiFi or Wireless settings. Turn on WiFi and select your network (SSID) from the list. Enter the WiFi password when prompted, and the device will connect.
In the case of printers, turning on WiFi might consist of pressing a physical button or navigating through the printer’s menu to enable wireless connectivity.
Once enabled, choose the appropriate WiFi network (SSID) and enter the WiFi password. The printer should connect to the WiFi network, allowing for wireless printing.
Connecting devices to a WiFi network involves locating your router’s login information, finding the SSID and network key, enabling WiFi on your devices, selecting your network, and entering the password. By following these steps, you’ll be able to establish a successful connection between your devices and your WiFi network.