As we all know, crown molding is known for turning a simple woodworking project, be it a bed, kitchen cabinet or even a normal closet door, into a masterpiece where art meets craftsmanship.
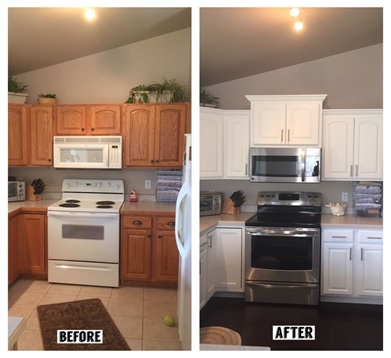
Upgrading your kitchen space only takes some skill, materials and old-school elbow grease. However, the tools are a woodworkers strongest asset, they are also the most expensive asset. A compound miter saw could make a difference of many work hours, but these saws are very expensive and not everyone will have access to one.
Fear not because this article tackles this very niche of people and we aim to teach you how to create these artful transformations using your everyday tools and the same everyday pain. Learn how to cut crown molding for your kitchen cabinets without using a compound miter saw!
How to achieve perfection with limited resources?
If you don’t have access to a compound miter saw making compound cuts accurately becomes pretty difficult and cumbersome, but not impossible!
We will highlight a few separate ways to complete this task and we will list the costs associated with each method.
Method 1: Fully Manual
Because you aren’t using a compound machine you will have the freedom to set the orientation of your crown molding however you please. The first method we would like to present is cutting your crown molding, manually.
This will be a great workout for your arms and it is definitely the cheapest of all the methods we will list today.
Step 1 – Tools, Assemble!
Tools required:
- A Triangle Protractor

- A Coping Saw

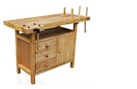
- A Woodworking Table- You could probably make one using the scrap wood. If not professional grade woodworking tables are commercially available and add a lot of versatility to your work setup!
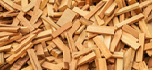
- Scrap Material for testing your cuts
- Sandpaper

Step 2 – Testing on scrap materials and Labeling
When you manually attempt to cut crown molding always remember to test whatever type of cut you are about to attempt on some scrap material beforehand.
 When using this method, remember to make sure that you label your crown molding so that you remember the orientation of the individual parts. Label the top, bottom, left and right edges.
Step 3 – The Rules of Engagement
While making your cuts just remember this rule. The left inside corner will sit on the right outside inside corner and the left outside corner will rest on the right outside corner.
Step 4 – Use your high-school geometry skills
Walls generally meet at 90° angles. Therefore the ends of adjacent pieces need to be cut at 45° angles to ensure that the corners are flush.
Mark a 45° angle on your molding and cut along it using your coping saw.
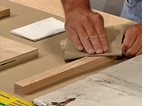
However some walls may be slightly off axis. You can compensate for this by sanding down uneven edges and giving a flawless finish to your project.
Method 2: Semi-Automagic!
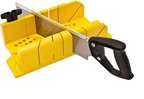
If you happen to have a powertool in your tool shed, then this method is more suitable for you. There is one additional extra purchase to be made, a miter box. This is a very handy and relatively inexpensive tool which can help make creative compound cuts.
Step 1 – Power Tools, Assemble!
Tools Required:
- Power saw/Normal saw if you don’t have power tools- Electric Hand Saws can be as cheap considering the value they add to the overall production process. Time is our most valuable asset in the work industry, and these tools save time!

- Miter Box- Some sets come with a Saw
- Sandpaper
- Triangle Protractor
Step 2 – Learn how to utilize your tools
Learning to use the miter box is pretty easy. There are two pegs which can be placed into different slots in order to change the orientation of the wood and the angle at which it rests. This is a highly versatile tool and there are many different types. The one we are showcasing is the cheapest and simplest. You can use a handsaw or even a power saw that will fit into the slots to make cuts on any kind of molding or wood pieces. There are more complex miter boxes which come with saws attached to them. Might as well save some cash and invest in a compound miter saw if you decide to get that.
Step 3 – Mark your Crown Molding and make the cut!
Just mark the desired angle on your crown molding. Set it up in your miter box and cut away! The slots make sure that your cuts will remain accurate. Use a sandpaper to smooth out the edges.
Endgame
There you have it! Two simple and inexpensive ways to cut your crown molding for kitchen makeovers or home decor.
However, if you are a serious woodworker who is always working on home renovations and decor you might consider investing in a compound miter saw.
A lot less effort and a lot more fun!