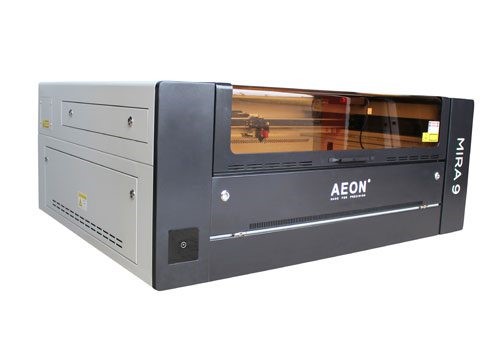
A CO₂ laser cutter is a powerhouse tool in manufacturing, capable of precision cutting, engraving, and shaping a variety of materials. Yet, most operators only tap into about 60% of their machine’s full potential. That’s a lot of wasted efficiency, speed, and quality.
Whether you’re managing high-volume production or tackling intricate designs, a few strategic tweaks can seriously improve your results. From fine-tuning power-speed ratios to perfecting your cut path, these eight hacks will elevate your workflow, reduce waste, and save you time.
1. Master the Grid Layout for Faster Workflows
Lining up your cuts perfectly every time isn’t just about precision—it’s about efficiency. A well-calibrated grid layout keeps your workflow smooth and consistent.
- Use your software’s array tool to create a grid that aligns with your laser’s coordinate system.
- Run a test cut on scrap material to make sure everything is properly calibrated before you start a big project.
- Paint or engrave a physical grid directly onto your waste board for easy positioning that won’t get covered by future projects.
2. Double-Pass Cutting for Cleaner Edges
One-pass cutting seems faster, but it can leave charred, uneven edges—especially on wood and acrylic. A double-pass approach minimizes heat buildup and prevents burn marks.
- Pass one: A lower power, high-speed cut to outline the shape.
- Pass two: A deeper, slower cut to finish the job cleanly.
Bonus: This method is great for intricate designs, keeping edges sharp without scorching.
3. Optimize Material Height for Crisp Cuts
Focal height is everything in laser cutting. If your material isn’t positioned at the right distance from the lens, your cuts will suffer.
- For most materials, keep the distance between the laser lens and surface at 1-3mm.
- Use the ramp test (cutting at various heights and measuring kerf width) to find your machine’s ideal Z height.
- Check your material’s flatness—warped surfaces need extra adjustments for precision.
4. Find Your Power-Speed Sweet Spot
Speed and power settings are the difference between a perfect cut and a frustrating mess. Keep a power-speed matrix for common materials to dial in the best results:
- Thin materials (paper, cardboard): Low power (20-40W) + high speed (400-1000 mm/s).
- 3mm acrylic: ~50W at 500 mm/s.
- 6mm wood: ~80W at 300 mm/s.
Pro tip: Running your laser at 90-100% power all the time shortens tube lifespan. Instead, use multiple passes at lower power to get clean results and extend your machine’s longevity.
5. Defocus for Thicker Lines and Softer Engravings
Want bold engraving lines or a softer burn effect? Adjusting your focus point above or below the material surface spreads the laser beam, creating a wider stroke.
- For materials over 3mm thick, try defocusing by about one-third of the material thickness.
- For engravings, a slight defocus (1-3mm) gives a softer, darker burn.
- Test on scrap material before committing—it takes a bit of experimenting to find the right balance.
6. Optimize Vector Paths for Faster Cutting
Vector path planning makes a difference in speed and accuracy. Messy files slow down production and increase waste.
- Use vector files instead of raster images—programs like Inkscape or Illustrator can convert bitmaps.
- Simplify designs by reducing unnecessary nodes.
- Set stroke width to 0.001 inches (RGB red) for cut lines to ensure precise execution.
Also, organize layers for separate cutting, engraving, and scoring operations. This helps your laser follow the most efficient path instead of bouncing around unpredictably.
7. Consider Temperature When Choosing Materials
Heat plays a role in how materials react to laser cutting. Too much heat? You get charred edges. Too little? Incomplete cuts.
- Wood burns cleaner at higher speeds—40W power at 15mm/s for 3mm birch plywood is a solid starting point.
- Acrylic melts easily—use lower power settings to avoid distortions.
- Metals need high power and slow speeds due to their thermal conductivity.
Don’t forget ventilation! Some plastics release harmful fumes, so always use proper exhaust systems.
8. Emergency Stop: Your Safety Net
Your laser cutter is powerful—but accidents happen. If you haven’t tested your emergency stop system recently, now’s the time.
- Test your E-stop button regularly to ensure it shuts down both the laser and control panel instantly.
- Check wiring and button mounts for wear and tear.
- Keep interlock systems active—they prevent high-voltage hazards and accidental laser exposure.
Final Thoughts
These CO₂ laser cutter hacks might seem like small tweaks, but together, they make a huge impact on cut quality, efficiency, and machine longevity. Whether you’re engraving intricate designs or slicing through thick materials, dialing in the right settings saves time, reduces waste, and improves results.
Try these techniques on your next project—you’ll wonder why you didn’t start sooner!
