Have you ever deleted files permanently by accident? Have you ever lost your files due to an unexpected error or system crash? You must freak out in such situations and long for a way to retrieve your precious data.
If you search the Internet, you’ll find a variety of data recovery software available. However, you may pay according to the size of the data to be recovered, and it can take a long time for the software to scan for lost files.
Is there a free and quicker way to restore lost data? Backup is the answer. If you have created a system backup, you can restore your computer to a normal state easily in case of system crash. And if you have created a backup for your important files, you can quickly recover lost/deleted files from the backup image.
Best Free Backup Software to Protect Your Crucial Data
To set up all-around data protection, you need professional backup software. The best free backup software – AOMEI Backupper Standard can help you backup and restore files in Windows 10/8.1/8/7/Vista/XP. Learn about its main features below:
Backup Types
To meet your different backup needs, AOMEI Backupper offers four major backup types.
- System Backup: Backup all contents on the system drive, EFI system partition, and recovery partition.
- Disk Backup: Backup all data on an HDD, SSD, SD card, USB flash drive and other storage devices.
- Partition Backup: Backup the selected partition(s) on a disk.
- File Backup: Backup files or folders that matter to you.
Backup Schedules
For the data on your computer change every day, it is necessary to keep your backups up-to-date. You can run a backup manually after the data have been changed. However, it is toilsome and you may forget to do a backup sometimes. At this time, you can resort to backup schedules in AOMEI Backupper.
- Daily: You can set a time point to run a backup every day. Or you can choose a start time and finish time to run a backup every 1/2/3/4/6 hours.
- Weekly: You can choose a day or several days in a week to run a backup.
- Monthly: You can specify a day or several days in a month to perform a backup.
Backup Destinations
AOMEI Backupper allows you to backup your computer data to different places.
- Hard Drives: It supports backing up to internal/external HDDs or SSDs. You are also allowed to backup to a USB flash drive or pen drive, etc.
- Network Share/NAS: It enables you to backup to a network location or NAS device like Syn-ology NAS and QNAP NAS.
- Cloud Services: It allows you to backup local folders to a cloud service. It supports Google Drive, Dropbox, OneDrive, Box, SugarSync, hubiC and Cloudme.
Tutorial: Create an Automatic Backup via AOMEI Backupper
Take “File Backup” as an example. I’ll show you how to set up an automatic backup for important files in detail.
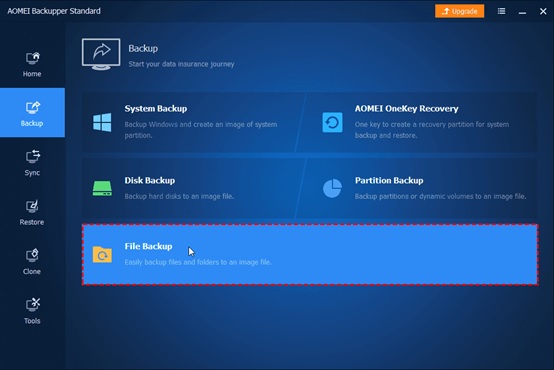
Step 1. Download the free backup program and finish installation. Launch AOMEI Backupper and select File Backup under the Backup tab.
Step 2. Click Add Folder or Add File to select the folders/files that you want to backup.
Step 3. Select where you want to store the image file. It is recommended not to backup to a local disk. Otherwise, the backup image can be damaged due to computer errors.
Step 4. Click Schedule in the bottom. In the pop-up window, you can set an appropriate backup frequency under the General tab.
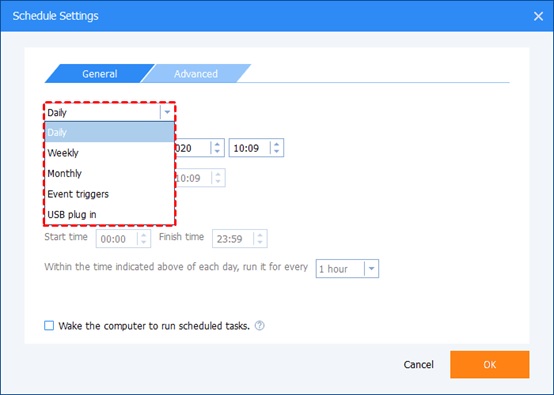
✎ Note: The scheduled backup will be performed in the way of incremental backup by default. You can see other options under the Advanced tab.
Step 5. Confirm the operation and click Start Backup. Choose Add the schedule and start backup now to run the backup immediately or choose Only add the schedule to run it later.
How to recover lost/deleted files?
If you lose your files in the future, you can try one of the following methods to recover data:
Method 1. Run AOMEI Backupper and find the file backup task under the Home tab. Expand the drop-down menu of the task and select Restore. Follow the wizard to do the remaining steps.
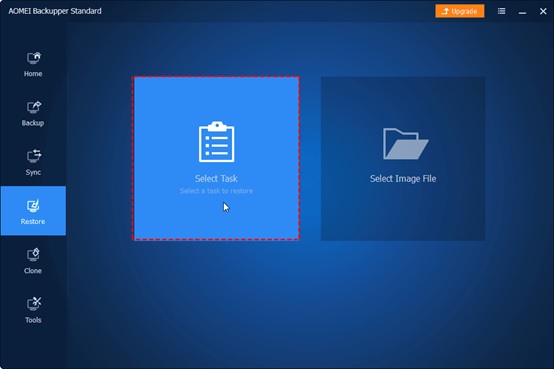
Method 2. Run AOMEI Backupper and click Restore from the left panel. Choose Select Task to locate the file backup task or Select Image File to locate the backup image. Follow the on-screen instructions to complete the recovery process.
The End
Backup makes it easy and quick to recover lost data, and you may need automatic backups for continuous data protection. As cloud drives are becoming more and more popular, you can turn to a free cloud backup service to backup your files to cloud.