Summary
This detailed guide covers how to easily record your screen on Windows 10 using built-in tools or third-party software. Learn how to record audio, edit your recordings, and produce movies of the highest quality; keep reading to know more!
Introduction
Welcome to our tutorial on how to record your screen on Windows 10! Whether you’re a gamer looking to record yourself playing video games, a content creator making video tutorials, or just someone who wants to record their screen for any other reason, there are plenty of options available to you on Windows 10.
In this article, we’ll cover everything you need to know about screen recording on Windows 10, including how to use the built-in screen recording tools and screen recorders for Windows that offer more advanced features. We’ll also show you how to capture audio, edit your recordings, and create professional-quality videos. So let’s get started! With the right tools and a little know-how, you’ll be recording your screen on Windows 10 like a pro in no time.
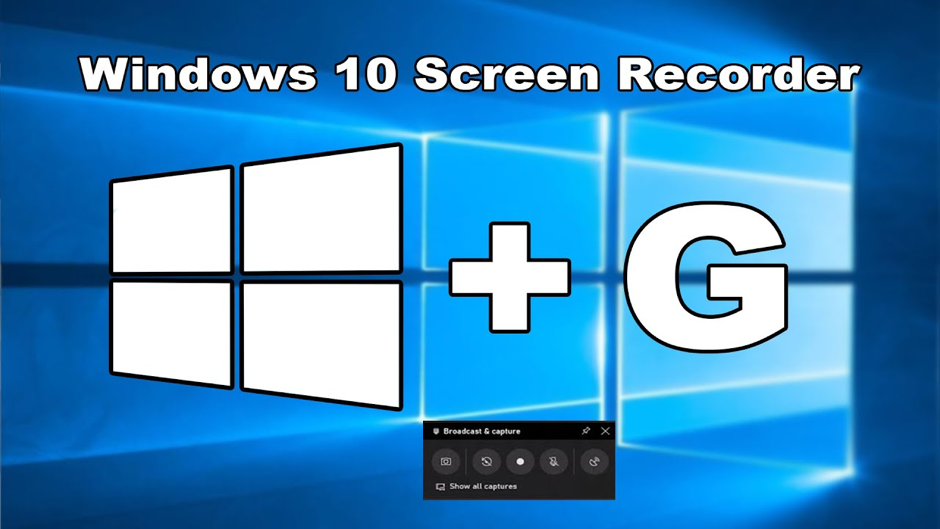
Alt: How to Record Your Screen on Windows 10
Part 1. Does Windows 10 Come with a Screen Recorder?
Yes, Windows 10 does come with a built-in screen recorder. The screen recorder is part of the Xbox Game Bar, a feature included with Windows 10. You can use the screen recorder to capture video and audio of your screen activity, including any programs you have open and any sounds played on your computer. To use the screen recorder on Windows 10, follow these steps:
Step 1: Press the Windows key + G to open the Game Bar.
Step 2: Click the “Record” button to start recording your screen.
Step 3: When you’re finished, click the “Stop” button to stop the recording.
The screen recording will be saved to your Videos folder called “Captures.” You can access the recording by opening the folder and double-clicking on the file. The screen recorder in the Xbox Game Bar is a convenient and easy-to-use tool for basic screen recording needs. However, if you need more advanced features, such as editing your recordings or adding annotations, you may want to consider using third-party screen recording software.
Way 1. Record Your Screen on Windows 10 via Xbox Game Bar
The screen recorder in the Xbox Game Bar is a convenient and easy-to-use tool for basic screen recording needs. Press the record button to start recording and press the stop button when you’re done. The recording will be saved to your computer, and you can access it by opening the Captures folder in your Videos folder. To record your screen on Windows 10 using the Xbox Game Bar, follow these simple steps:
Step 1: Press the Windows key + G to open the Game Bar.
Step 2: Click the “Record” button to start recording your screen.
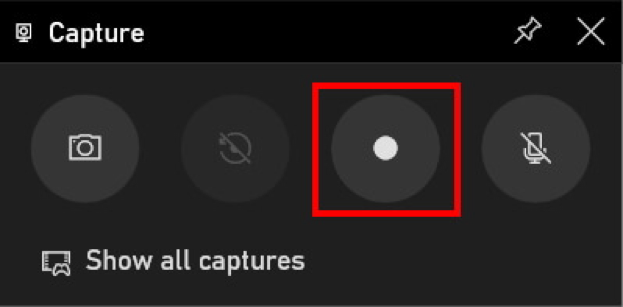
Step 3: When you’re finished, click the “Stop” button to stop the recording.
Step 4: The screen recording will be saved to your Videos folder. You can access the recording by opening the folder and double-clicking on the file.

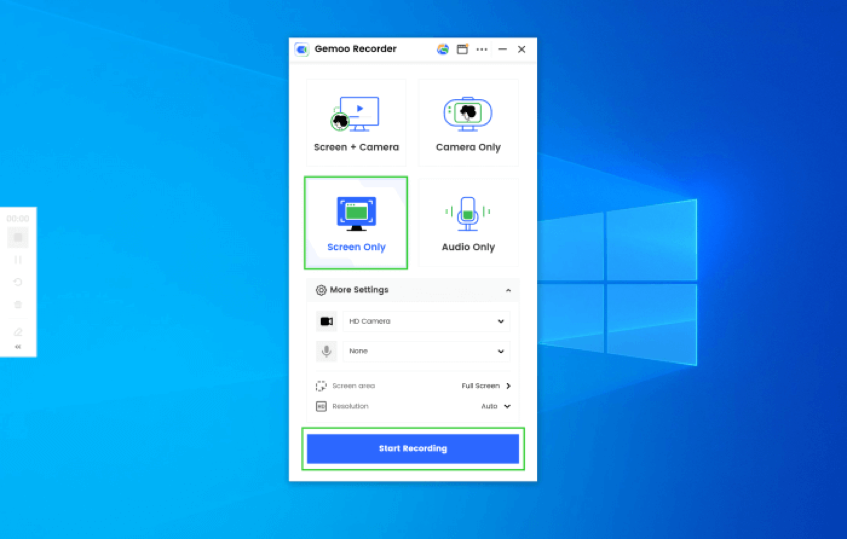
Way 2. Record Your Screen on Windows 10 via Gemoo Recorder
As Xbox Game Bar is sometime buggy, we highly recommend you to try another professional software to record your screen on Windows 10. More than recording your gameplay, you can also use Gemoo Recorder to record PowerPoint presentation, favorite songs from YouTube, valuable audio books and other video and audio content online and offline. After finishing your recordings, you can manage your media content and materials on the cloud and share them with your friends in 1 click. Now, Free install Gemoo Recorder and continue reading to see how to record your screen easily and quickly.
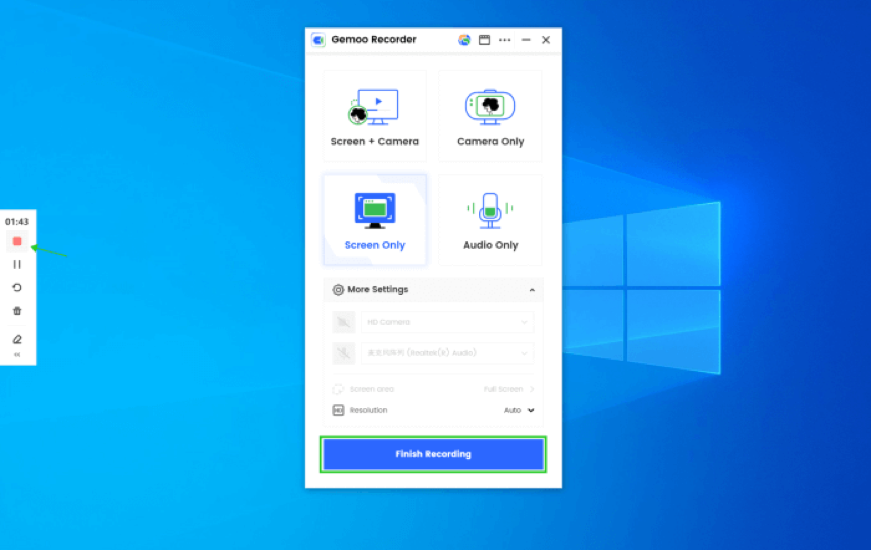
Step 1. Free install Gemoo Recorder and launch it on your computer. Choose the Screen Only feature if you seek to record your screen only.
Step 2. It will start to record your screen after a 3-second count down.
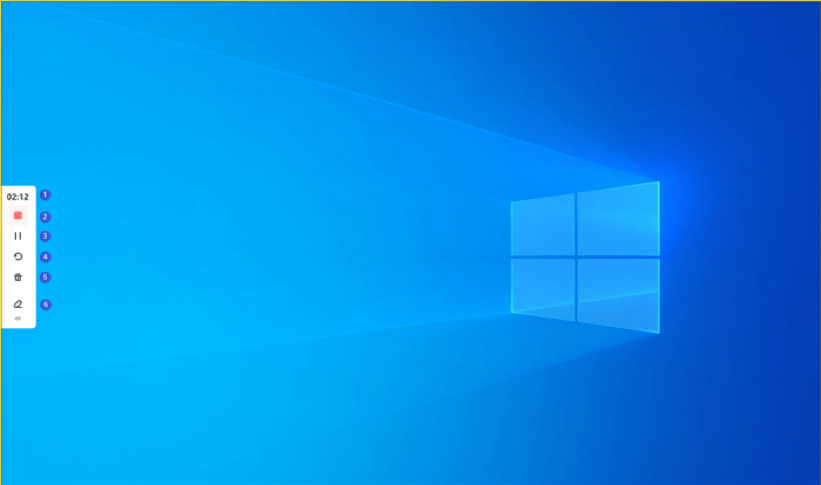
Step 3. When you finish recording, you can tap on the Red Stop button on the left tool bar.
Way 3. Record Your Screen on Windows 10 via OBS Studio
OBS Studio is a well-liked free and open-source screen recording and streaming program among gamers and video producers. It provides a wealth of sophisticated capabilities, including recording audio, adding notes and overlays, and broadcasting your screen activity to websites like Twitch and YouTube. To record your screen on Windows 10 using OBS Studio, follow these steps:
Step 1: Download and install OBS Studio from the official website (https://obsproject.com/).
Step 2: Open OBS Studio and click the “+” button in the “Sources” panel.
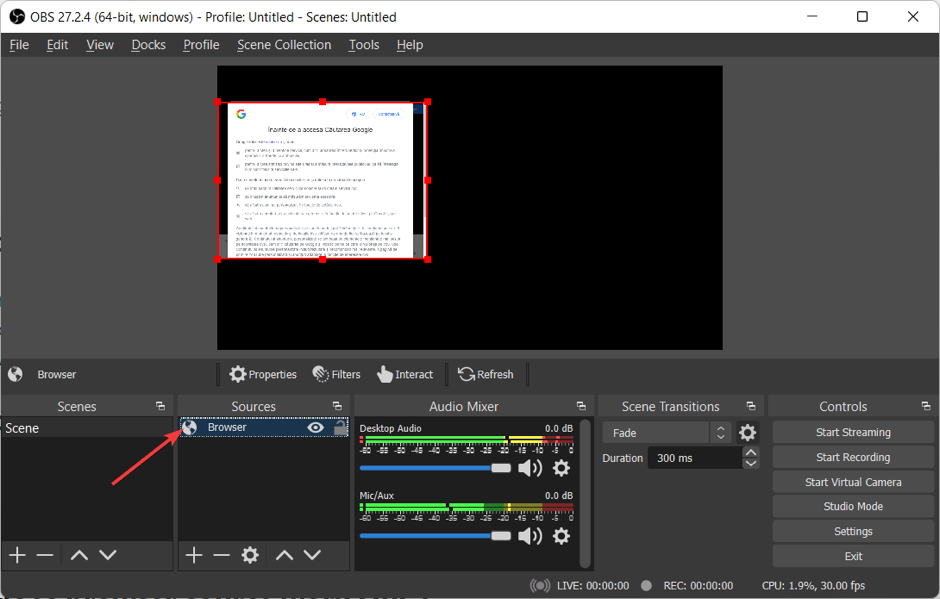
Step 3: Select “Screen Capture” from the list of options and click “Add.”
Step 4: In the “Create/Select Source” window, give your screen capture a name and click “Create.”
Step 5: In the “Properties” window, select the screen you want to capture and click “OK.”
Step 6: To start recording, click the “Start Recording” button in the bottom-right corner of the OBS Studio window.
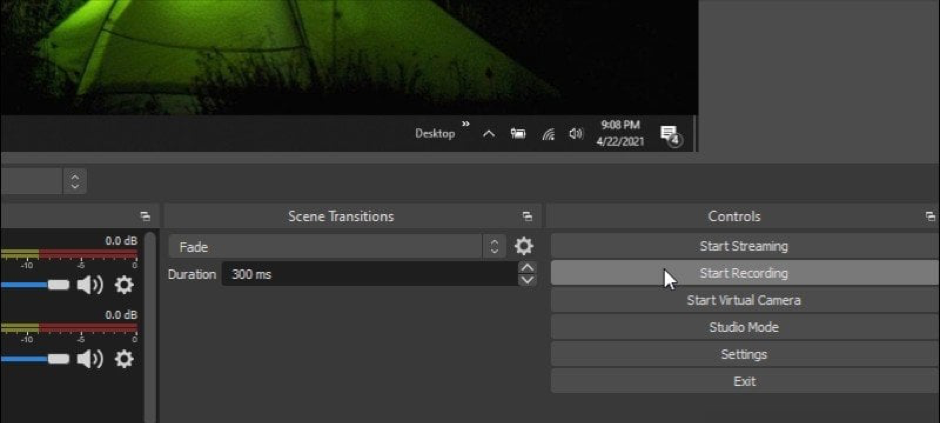
Step 7: When you’re finished, click the “Stop Recording” button to stop the recording.
The screen recording will be saved to the folder you specified in the “Output” settings. You can access the recording by opening the folder and double-clicking on the file.
Part 3. Why Can’t I Record/Capture My Screen on Windows 10?
There could be several reasons you cannot record your screen on Windows 10. Some common issues that may cause problems with screen recording include:
- The Game Bar is disabled: The screen recorder on Windows 10 is part of the Xbox Game Bar. If the Game Bar is disabled, you will not be able to use the screen recorder. To enable the Game Bar, go to the Settings app, click on “Gaming,” and then toggle the “Record game clips, screenshots, and broadcast using Game Bar” option to “On.”
- The Game Bar is not set as the default screen recorder: The Game Bar is not the default screen recorder on Windows 10. If you have another screen recording software installed, it may be set as the default screen recorder, causing recording problems.
- Insufficient permissions: You may not have sufficient permissions to use the screen recorder on Windows 10. To fix this, ensure you are logged in as an administrator on your computer.
- Hardware acceleration issues: If you use a graphics card that does not support hardware acceleration, you may experience problems with screen recording. To fix this, try disabling hardware acceleration in your screen recording software.
If you can still not record your screen on Windows 10 after trying these steps, other issues may be causing the problem. In this case, it may be helpful to seek assistance from a technical support specialist or search online for solutions to your problem.
Final Thought
Finally, screen recording in Windows 10 is a helpful and practical solution for recording audio and video of your screen activities. There are several choices accessible to you on Windows 10, whether you’re a gamer seeking to record your unforgettable gaming experiences or a content developer generating video lessons. The built-in screen recorder in the Xbox Game Bar is a practical and simple-to-use solution for simple screen recording requirements. You may want to use a third-party screen recording program like OBS Studio if you want more sophisticated capabilities to edit your recordings or add notes.