Several reasons may require you to convert a database from Microsoft SQL Server to MySQL. These include the huge license cost of SQL Server, better cross-platform support of MySQL, etc. Whatever the reason, a few tools can help you perform MS SQL to MySQL conversion without writing complex queries. In this article, we will talk about using Microsoft tools to perform the database conversion.
Demonstrating MS SQL to MySQL Database Conversion – An Example
To help you understand how to convert an SQL database to MySQL database, let’s demonstrate an example. We will create a database and its table in SSMS and then create a SQL Server data source. We will connect the SQL Server data source in MySQL Workbench to perform MS SQL to MySQL conversion.
Prerequisites
You will need the following to perform MS SQL to MySQL database conversion:
- Microsoft SQL Server Management Studio (SSMS)
- MySQL Workbench
Steps to Convert Microsoft SQL Database to MySQL Database
Follow these steps to perform SQL Server to MySQL database conversion:
Step 1: Create a SQL Server Database
Note: If you already have a database and table(s) that you want to convert from MS SQL Server to MySQL, skip to Step 2.
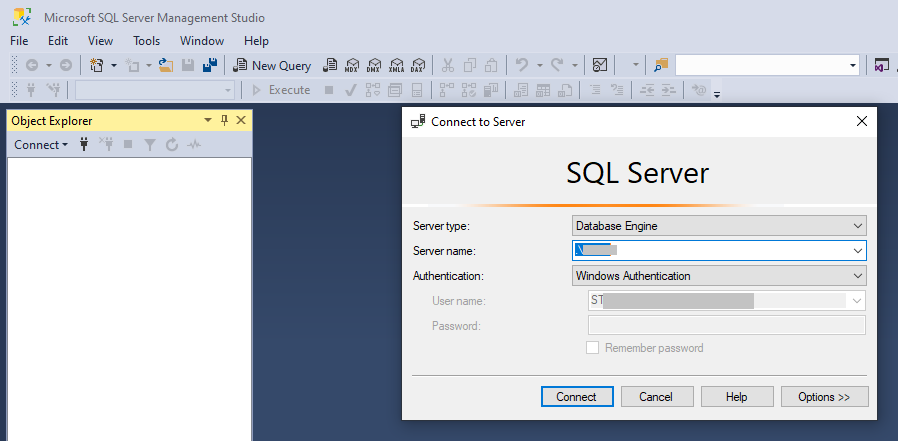
- Open SSMS and connect to your SQL Server instance.
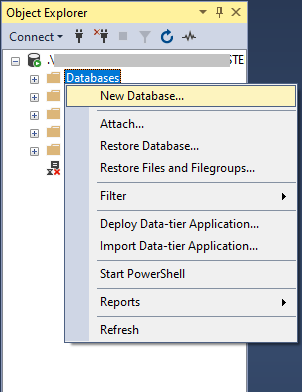
- Right-click on Databases, and then select New Database.
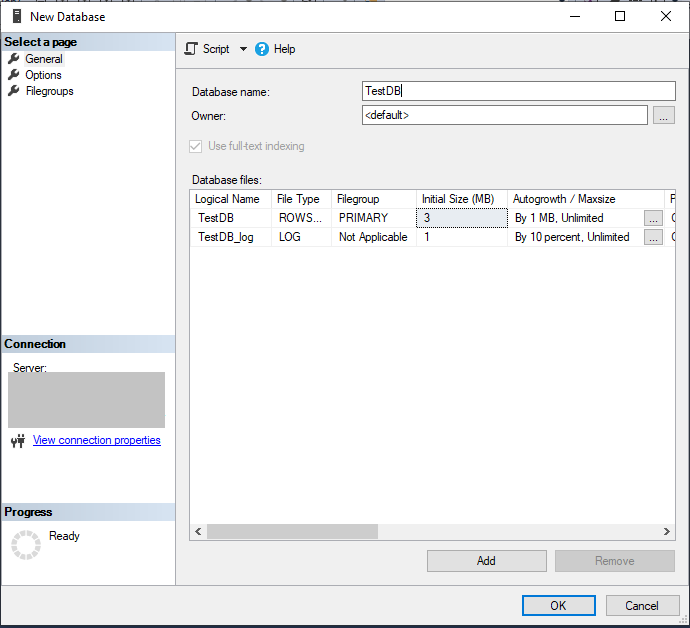
- In the ‘New Database’ dialog box, specify the name of the database you want to create. For instance, ‘TestDB’. Hit OK.
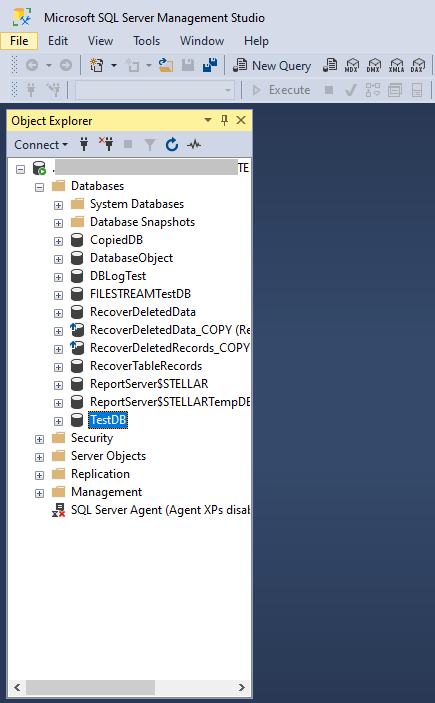
- Click on the “+” icon to expand Databases, and you can see TestDB in the list of databases.
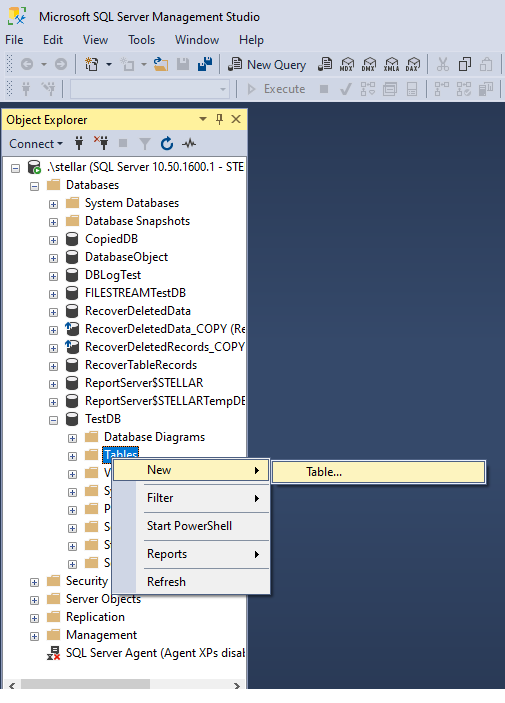
- Next, let’s create database tables. For this, expand the new database ‘TestDB’, right-click on Tables, and select New > Table.
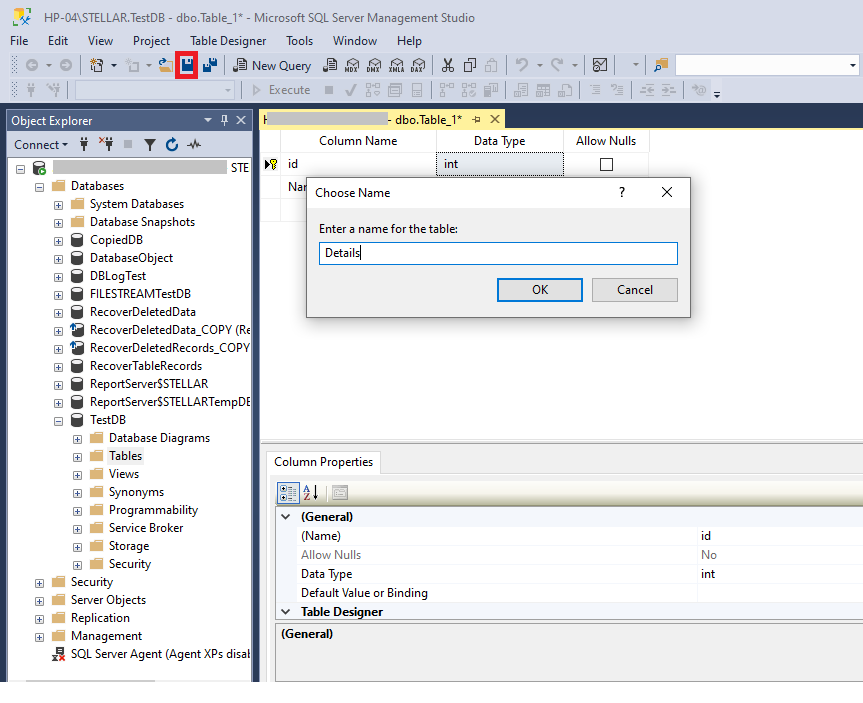
- Enter records into the new table, and then click on the Save In the dialog box that opens, enter a name for the table, say ‘Details’.
- Right-click on Tables, and then click Refresh. Now you can see the newly created table ‘dbo.Details’ under Tables.

Now that we have created a database and a table, let’s move to the next step.
Step 2: Configure an Open Database Connectivity (ODBC) Data Source
ODBC helps you to connect databases from different platforms. Here, we will discuss the steps to create a data source for MS SQL Server:
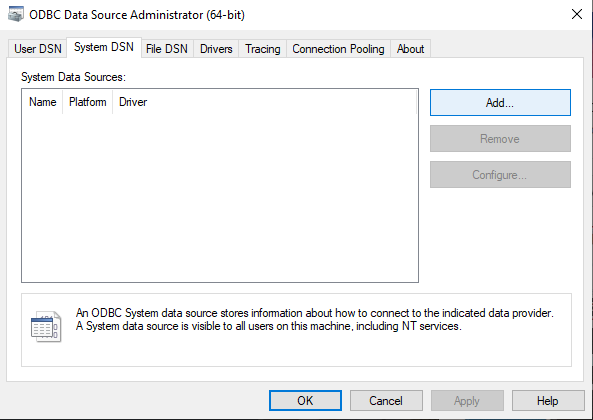
- Search for ODBC data source by typing odbc in the Windows search bar and open it.

- When the ‘ODBC Data Source Administrator’ window opens, click on System DSN, and then click Add.
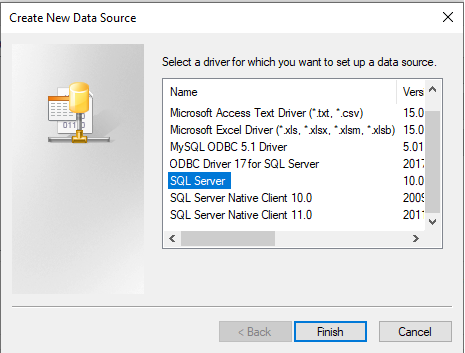
- In ‘Create New Data Source’ window, choose SQL Server, and then click Finish.
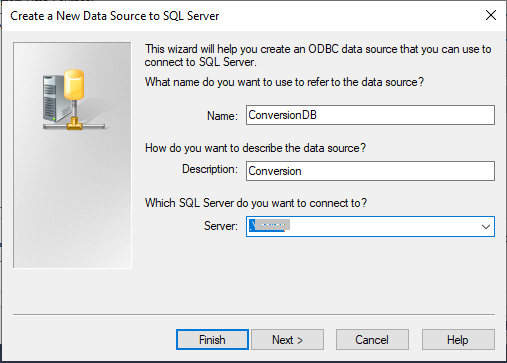
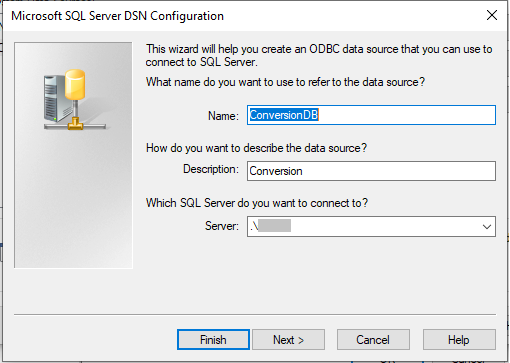
- Enter details such as the data source name, description, and your SQL Server instance. After specifying these details, click Next.
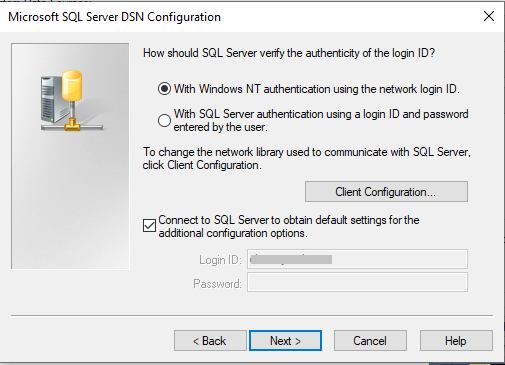
- Again, click Next.

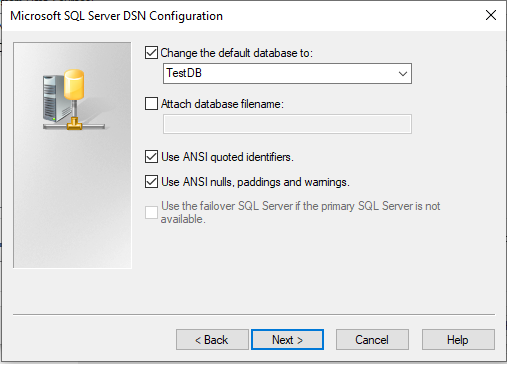
- In the Create a New Data Source to SQL Server dialog box, select the ‘Change the default location to:’ checkbox, choose the ‘TestDB’ database from the drop-down, and click Next.

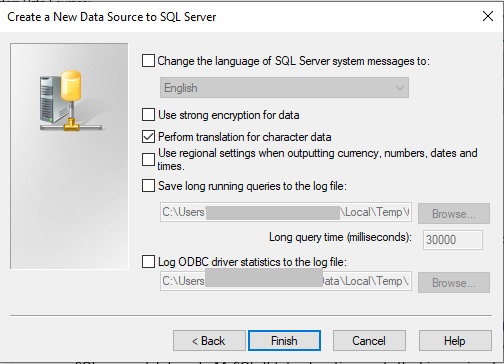
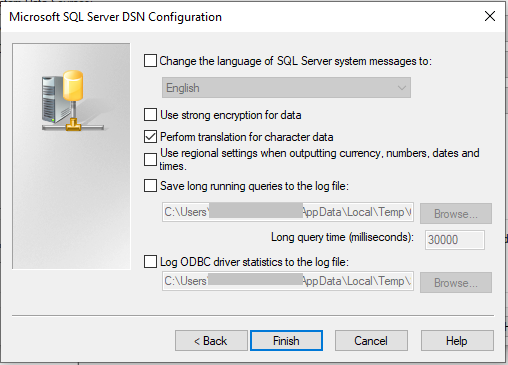
- Again, click Next and then Finish.
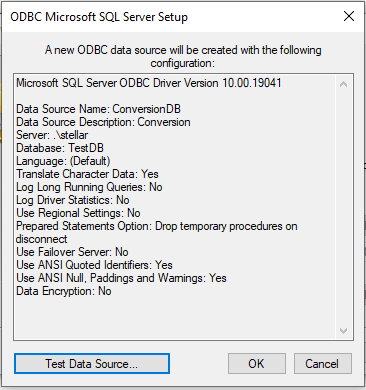
- When the dialog box to test data source appears, click OK.
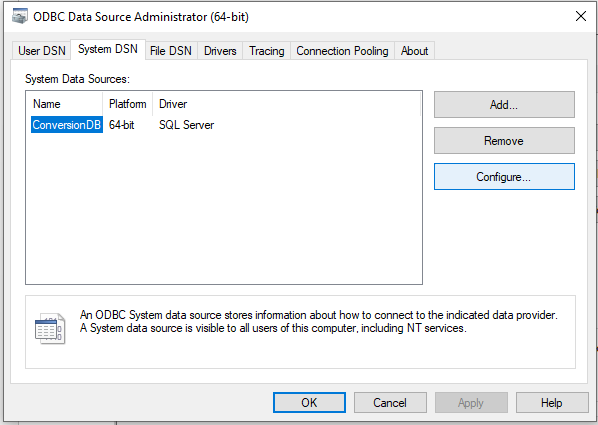
- In the ‘ODBC Data Source Administrator (64-bit)’ window, select the newly created data source, and then click on Configure.
- Click Next.
- Again, choose Next.
- Hit Next once again.
- Click Finish to complete configuring the data source.
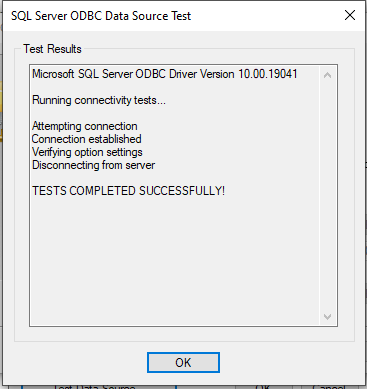
- Now click the Test Data Source button to ensure that the connection to the data source is established.
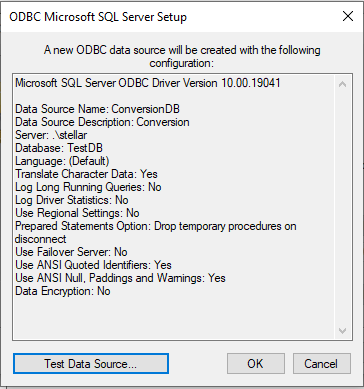
- As you can see, the connection to Microsoft SQL Server is established. Click OK and again press OK. And then, close the ‘ODBC Data Source Administrator (64-bit) window.’
Now that we have completed step 2, let’s move to the next and final step.
Step 3: Perform the Conversion
To perform SQL database to MySQL database conversion, you will need to open MySQL Workbench.
The MySQL Workbench is a Microsoft built-in tool designed to convert data from source RDBMS to the target MySQL database.
Note: If you don’t have MySQL Workbench installed on your machine, read about downloading and installing the built-in tool from here and install it.
Follow these steps to perform database conversion using the MySQL Workbench tool:
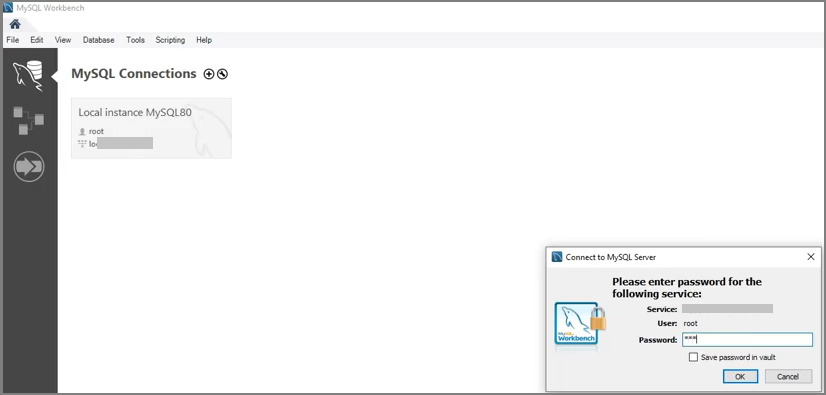
- Open MySQL Workbench and connect to a local MySQL server instance.
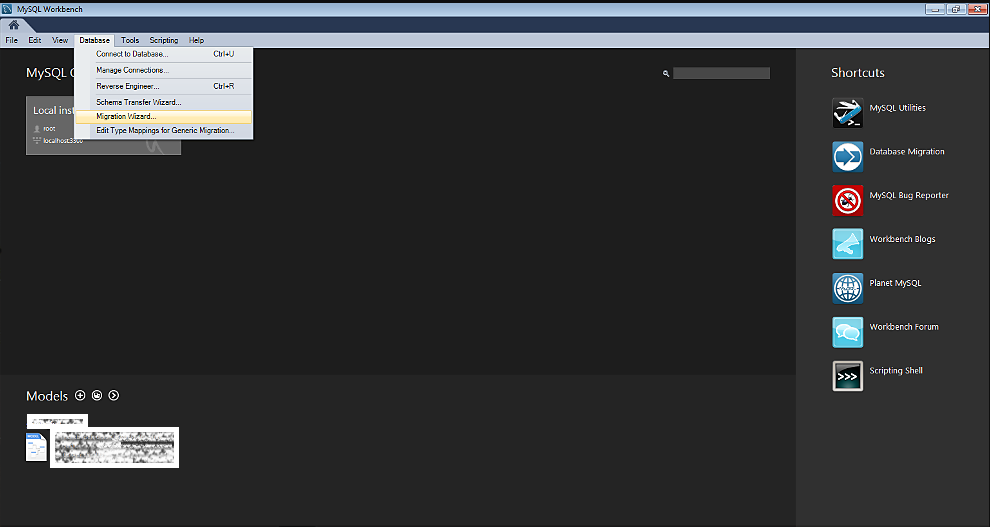
- Click on the Database tab, and then click Migration Wizard.
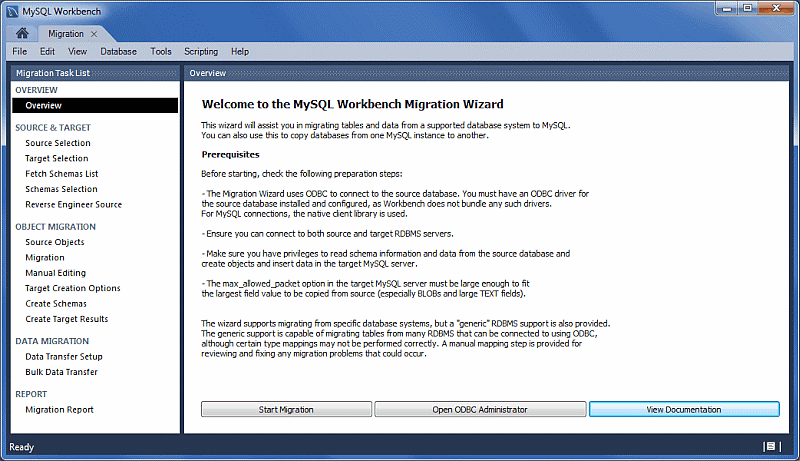
- From the Overview screen, select Start Migration.
Note: Carefully read the Prerequisites section to ensure a smooth conversion process.
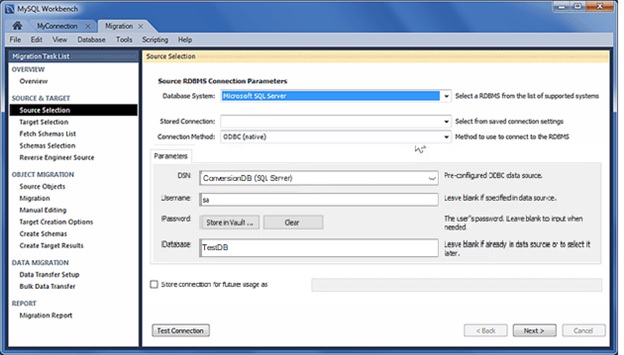
- From the Source Selection screen, choose Microsoft SQL Server as the ‘Database System’ and select ‘Connection Method:’ as ODBC Data Source. You can see ‘ConversionDB (SQL Server) added in the DSN textbox under the Parameters In this section, add the SQL database that you want to move (in our case, it is TestDB). Click Next.
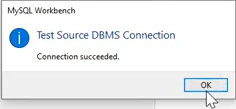
- Now click on Test Connection. When the ‘Connection succeeded’ message appears, click OK.
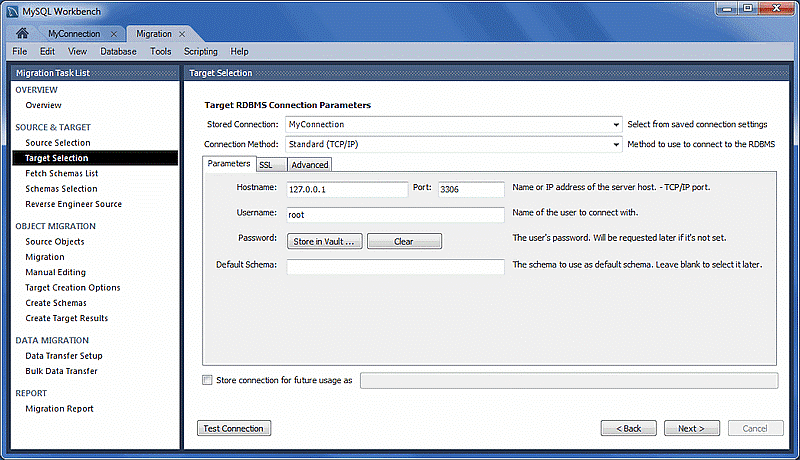
- Click Next on the ‘Source Selection’ screen. A ‘Target Section’ screen opens. In this screen, all the parameters required to connect to MySQL local server instance are set. Click Test Connection to ensure that connection to the target DBMS (i.e., MySQL) is established, and then hit Next.
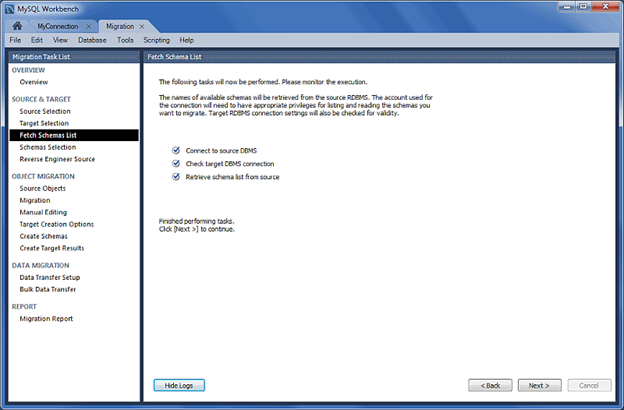
- A Fetch Schema List screen opens and automatically performs tasks, such as connecting to the data source, test connecting to the target DBMS, and retrieving a list of the schemas retrieved from the source. Once it completes performing all these tasks, hit Next.
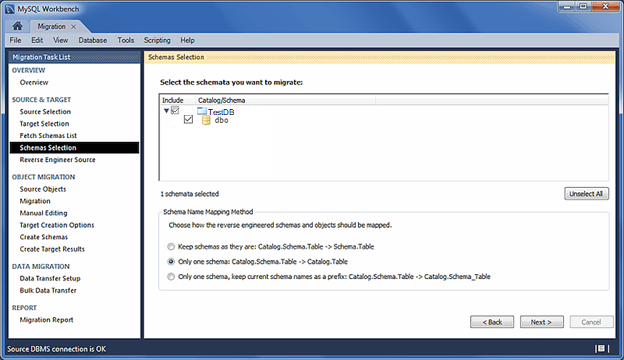
- In Schema Selection screen, select the database schema you want to convert, and click on the Next
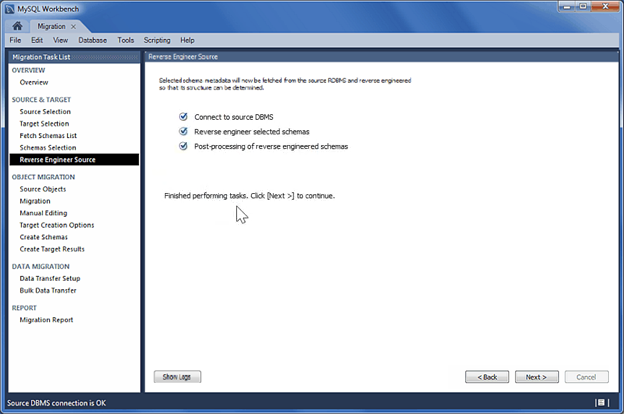
- A Reverse Engineer Source screen opens. Once it finishes performing the tasks, click Next.
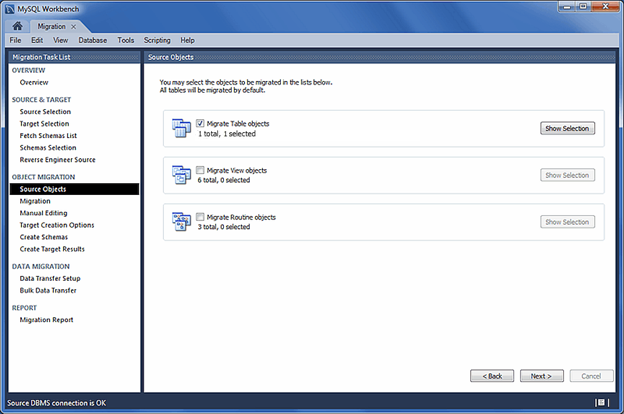
- The Source Objects screen opens and displays the source database objects to be converted. Choose the objects you want to move to the target database and hit Next.
Note: Tables of a database that can be migrated are selected by default. However, you can also choose ‘View objects’ and ‘Routine objects’ that you want to move.
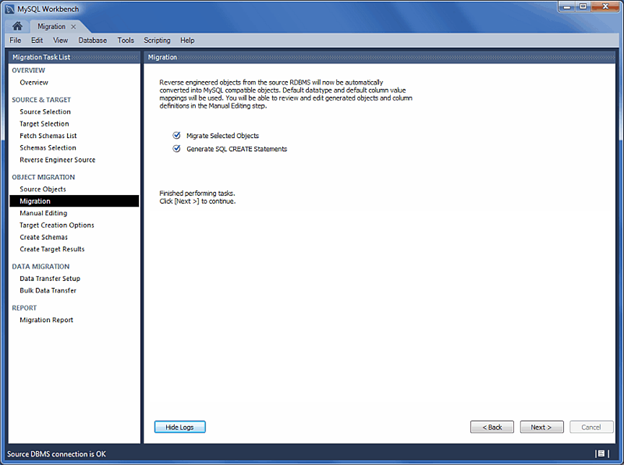
- A Migration window displays the objects from the source database that will be converted into MySQL compatible objects. Click Next once the MS SQL to MySQL conversion process is complete.
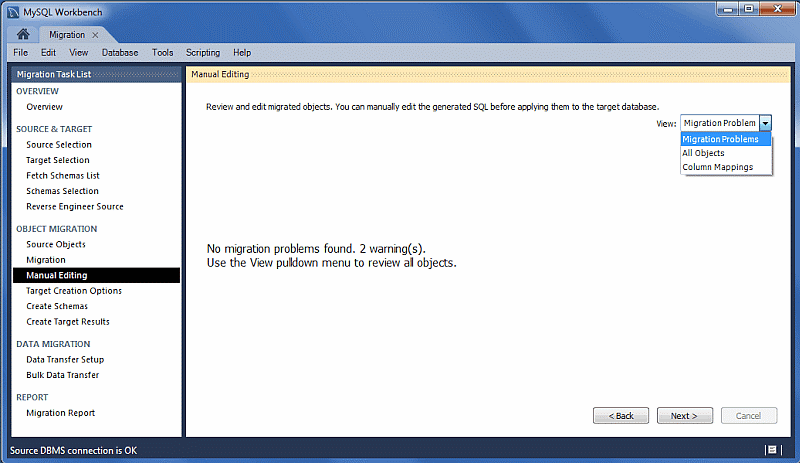
- A Manual Editing window opens with a View drop-down box that shows a list of the sections you can edit. Click Next to continue.
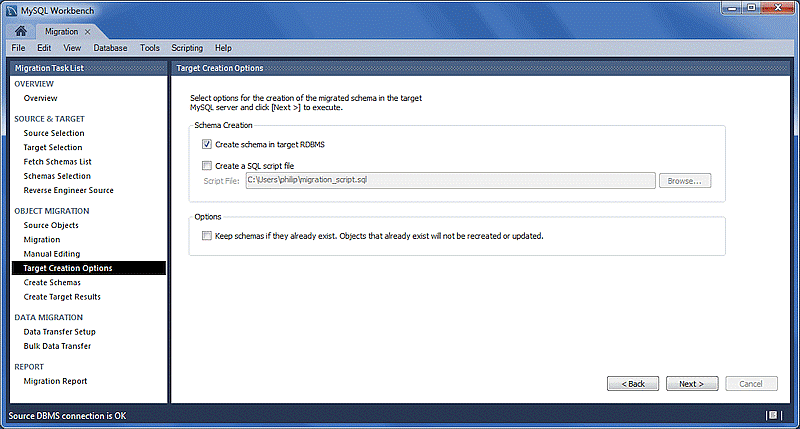
- A Target Creation Options screen opens with options that allow you to ‘Create schema in target RDBMS’ or ‘Create a SQL script file’. You can also select both options. Hit the Next
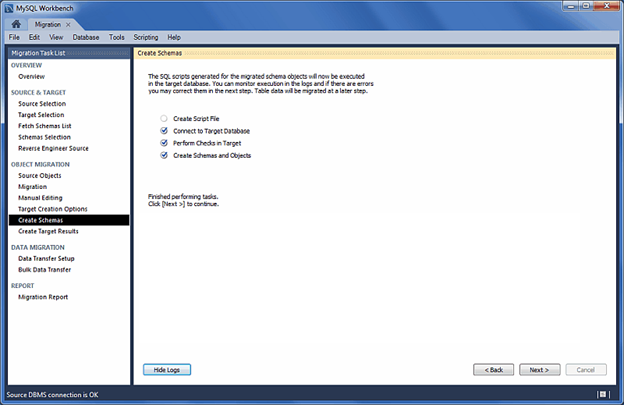
- A Create Schema window opens that automatically performs tasks, such as ‘Connect to Target Database’, ‘Perform Checks in Target’, and ‘Create Schemas and Objects’. Once the tasks are completed, click Next.
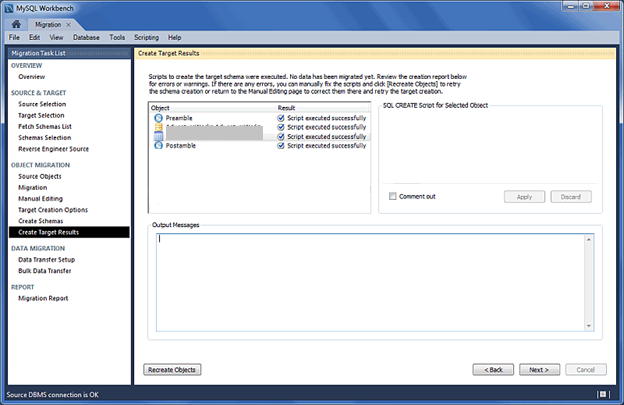
- The objects you have selected to be converted from MS SQL to MySQL compatible objects are displayed in the Create Target Results Verify the objects and click Next.
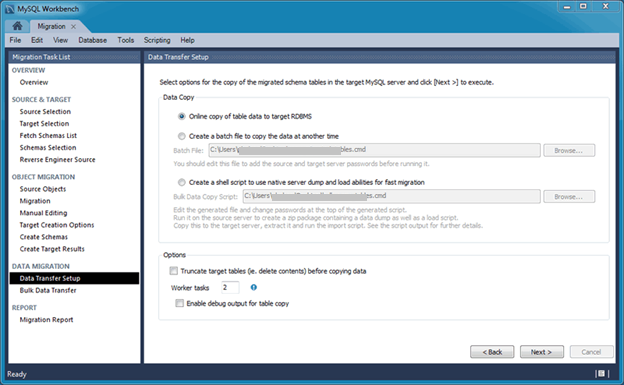
- Click Next to proceed with the MS SQL Server to MySQL database conversion process.
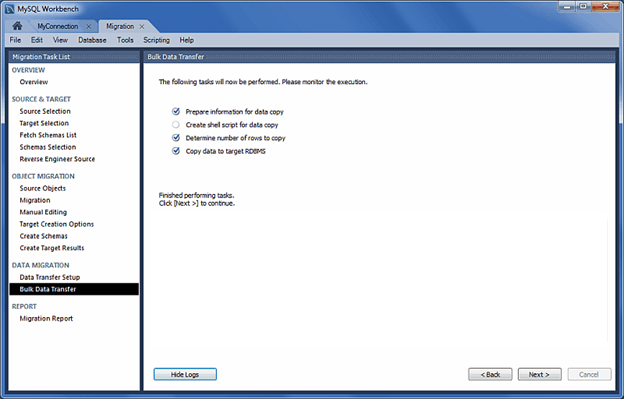
- In Bulk Data Transfer screen, once all the tasks are performed, click Next.
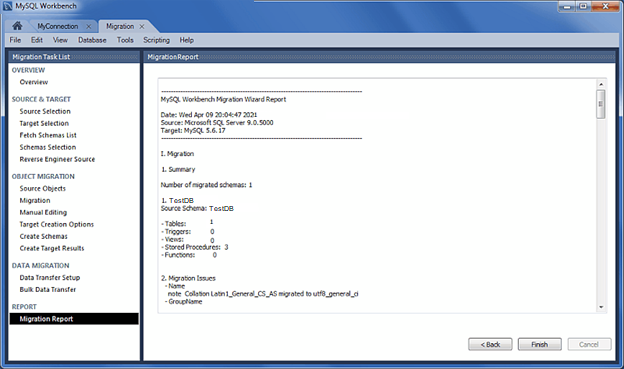
- The Migration Report page will summarize the source database objects converted into MySQL compatible database objects. Click Finish to exit the Migration Wizard.
After completing these steps, the selected objects from the MS SQL database will get converted into MySQL compatible objects.
Conclusion
This article demonstrated creating a SQL database and table in SSMS, creating a SQL Server data source, and converting the SQL database and its objects into MySQL database using MySQL Workbench. You can follow the steps discussed in detail in the article to perform SQL database to MySQL database conversion. However, it is a time-consuming process and may cause data inconsistency.
A better alternative is to use Stellar Converter for Database software that helps perform quick conversion of SQL database to MySQL database without data inconsistency. The software is specially designed to reduce the time and effort needed to convert one database file format to another file format. It allows conversion of MS SQL database to MySQL, MS Access, SQL Anywhere, SQLite, and vice versa.